Actualización de la unidad principal del Honda Accord 2008-2012 (con imágenes)
Actualización del estéreo Honda Accord 2008-2012
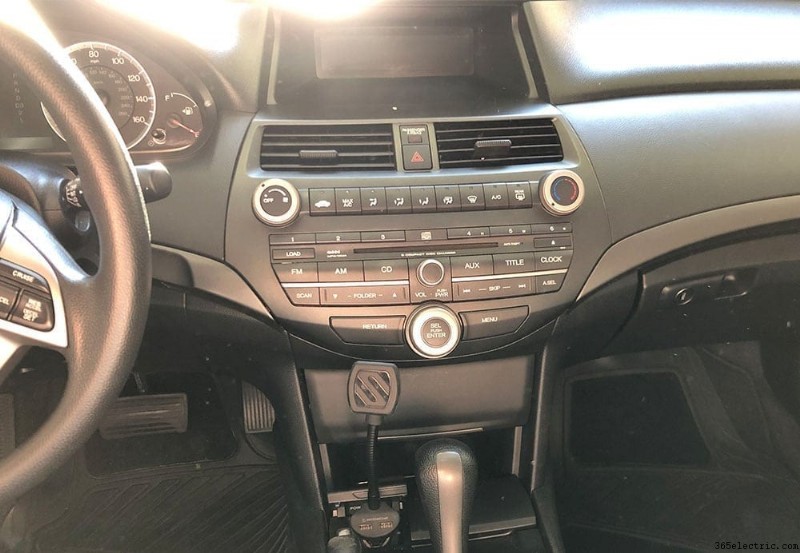
No creo que nadie consideraría emocionante conducir un Honda Accord antiguo de ninguna manera. Lo más probable es que conduzcas uno porque es un automóvil muy económico, confiable y, en general, atractivo. Pero tampoco creo que nadie argumente que el Honda Accord de octava generación es un auto deficiente. Es elegante (relativamente) y se conduce muy bien. Es confiable:el mío tiene 125k y lo único que reemplacé fue la bomba de dirección porque sentí que estaba haciendo demasiado ruido. Es un automóvil seguro y tiene altas calificaciones de choque. Y para su época el estéreo era decente, aunque no lo consideraría de alta tecnología.
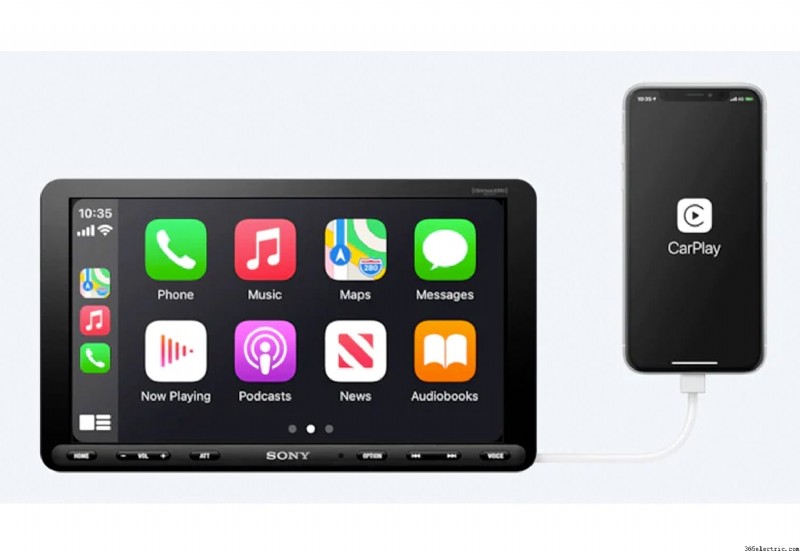
Los estéreos del Accord también son como el resto del auto:si no los golpeas todo el día, durarán. Pero incluso a las nuevas versiones del Accord les vendría bien una actualización con una de las últimas unidades principales del mercado. Desde 2012 han cambiado muchas cosas en las unidades principales, Apple CarPlay y Android Auto por sí solos están cambiando el juego en términos de cómo integramos nuestros dispositivos móviles en la tecnología de nuestro vehículo mientras estamos en la carretera. La instalación de un nuevo estéreo del mercado de accesorios hará que su viaje o manejo sea más placentero y lo pondrá al día con la tecnología y las características más recientes.
En este artículo, lo guiaré a través del proceso de quitar la unidad principal de su antiguo Accord, preparar su nueva unidad principal del mercado de accesorios, instalar su nueva unidad principal del mercado de accesorios e instalar una nueva cámara de reversa.
Acerca de la instalación - Tiempo total de instalación:4-5 horas
- Costo total de esta instalación:$740
- Dificultad:fácil (bricolaje de fin de semana)
- Vehículo:2009 Honda Accord LX-S Coupe (sin navegación)
Recientemente tomé el Accord 2009 de mi esposa como mi conductor diario. Tenía alrededor de 110k millas en él. Viajo alrededor de 60 a 65 millas por día, valió la pena... Tenía sentido. Es un cupé 09 LX-S con reproductor de CD multidisco. No tiene navegación GPS, ni bluetooth, solo una entrada auxiliar que está en la consola central para conectar mi iPhone. LOS TIEMPOS HAN CAMBIADO.
Aunque realmente no había nada malo con el estéreo OEM, solo me llevó unas pocas semanas conducirlo para convencerme de que necesitaba una actualización. En cuanto a los altavoces, el sistema de 6 altavoces (incluidos los tweeters) aún sonaba genial, así que no los actualicé con uno de nuestros 6.5 altavoces recomendados (todavía) y sentí que los subwoofers del mercado de accesorios serían excesivos para el propósito general para el que uso el automóvil. . Así que decidí actualizar la unidad principal y agregar una cámara de respaldo para llevarla a la década de 2020.
Herramientas y piezas
Permítanme enumerar las herramientas que recomendaría para el trabajo junto con todas las piezas reales que usé en la actualización del estéreo de mi Honda.
Herramientas:
- Destornilladores de cabeza plana y Phillips – $10
- Tiradores de paneles de puertas:$10
- Conectores de sello de soldadura de alambre (recomendado):$20 O engarzados de alambre tradicionales:$13
- Pistola de aire caliente (solo si obtiene los conectores de sello de soldadura):$16
- Pelacables:$13
Piezas:
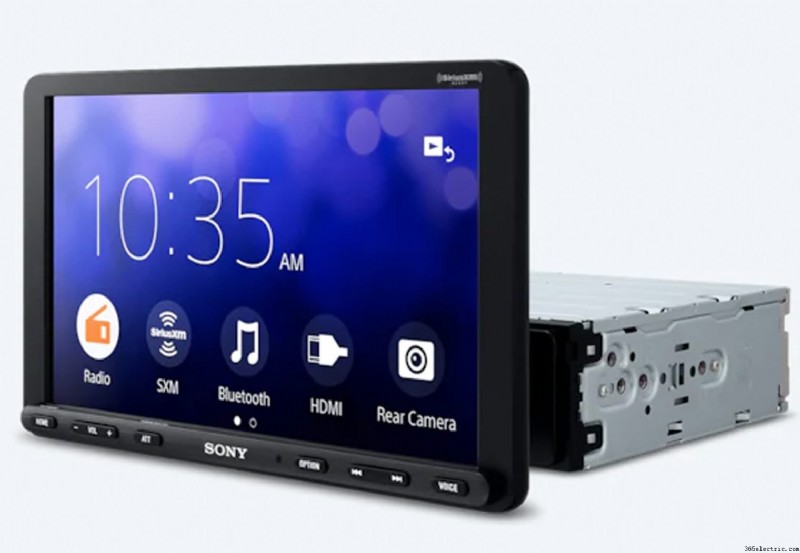
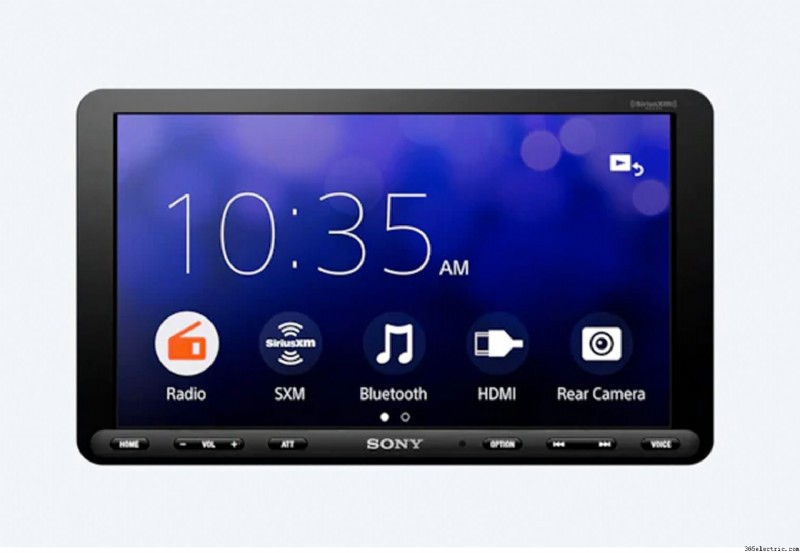
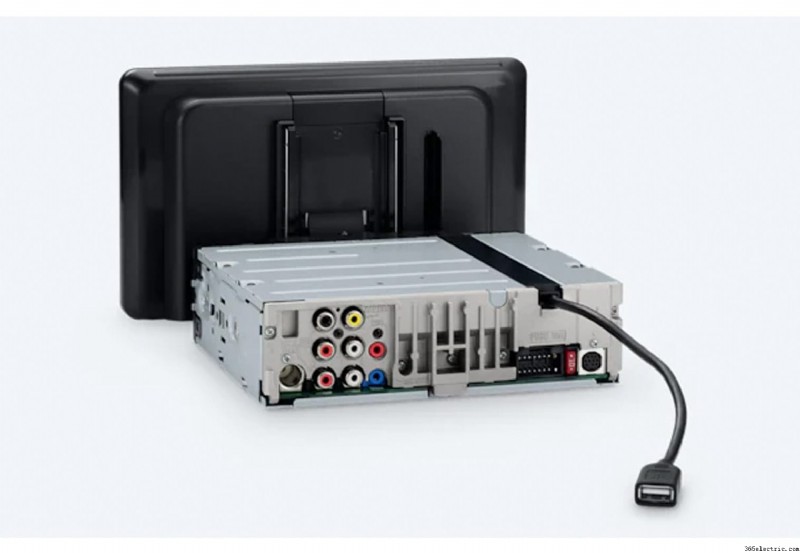
- Unidad principal:Sony XAV-AX8000 – $600. Vea nuestro Informe completo y revisión de esta unidad principal y sus características.
- Kit de tablero DIN doble/DIN simple sin aire acondicionado doble:Metra 99-7874 – $40
- Control del volante y adaptador de antena eléctrica:Crux SWRHN-62L – $52
- Cámara de respaldo:AUTO-VOX Cam 6 – $20
- Ganchos para tablero y consola central (por si acaso):Clips de retención para panel de radio y consola central Rexka (30) – $12
Paso 1:preparación de su nuevo radio de posventa
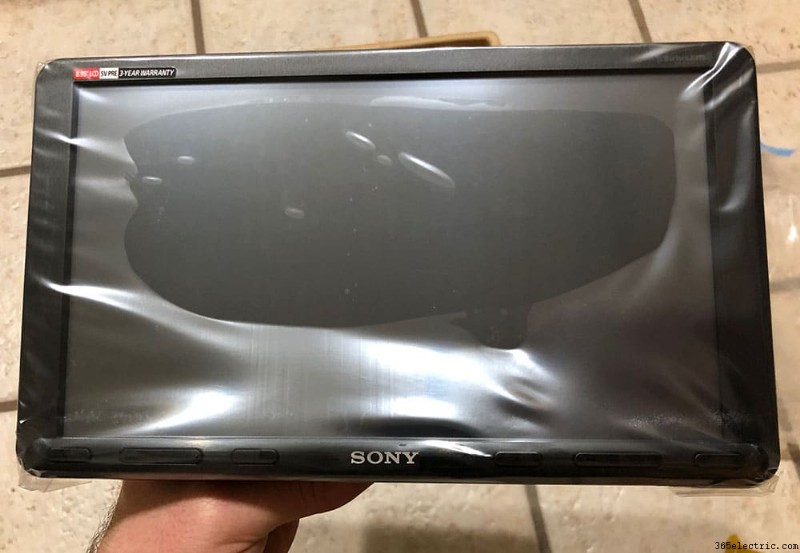
Profundicemos en ello. El primer paso antes de comenzar a tocar su radio OEM es desempacar su nueva radio de posventa. Revíselo en busca de fallas y asegúrese de que todas las piezas que necesitará estén incluidas. La parte clave para este paso que utilizará es el arnés de cables del fabricante, que unirá al arnés CRUX SWRHN-62L específico de su vehículo.
Algunos instaladores preparan sus nuevos radios de posventa después de retirar su unidad OEM. Esto normalmente es para inspeccionar el mazo de cables y asegurarse de que las piezas que ha comprado se ajusten al vehículo. Sin embargo, en este caso conocía las piezas que había emparejado al vehículo. Normalmente me gusta preparar todos los componentes nuevos antes de comenzar a extraer las piezas OEM para poder avanzar de inmediato con la instalación tan pronto como se hayan extraído las piezas OEM. También es una buena manera de dividir el tiempo de instalación. Hice toda mi preparación dentro de mi casa la noche antes de instalar la unidad principal y otras partes.
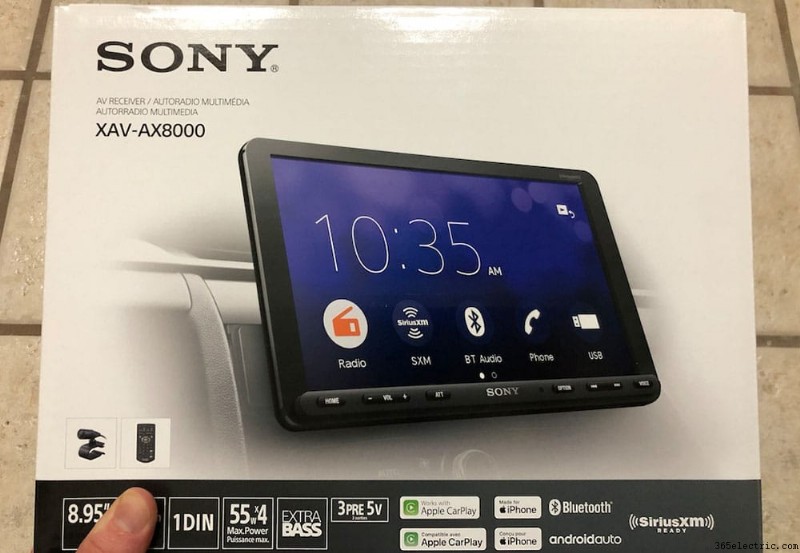
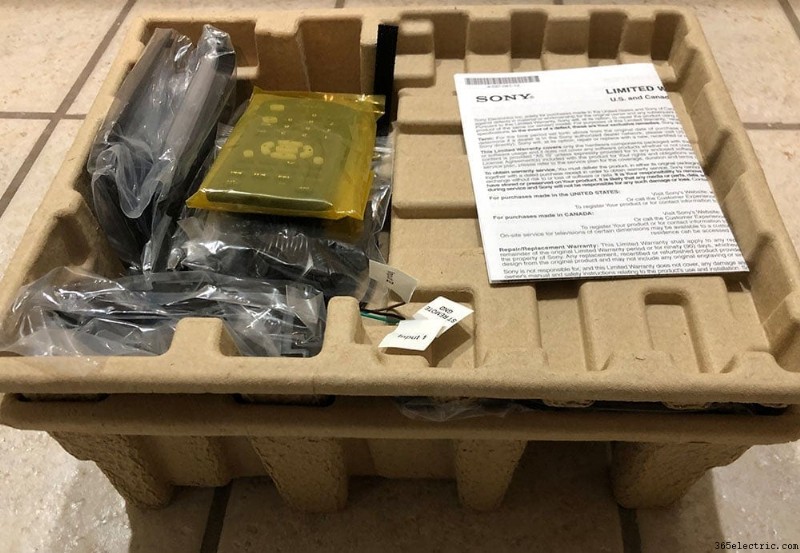
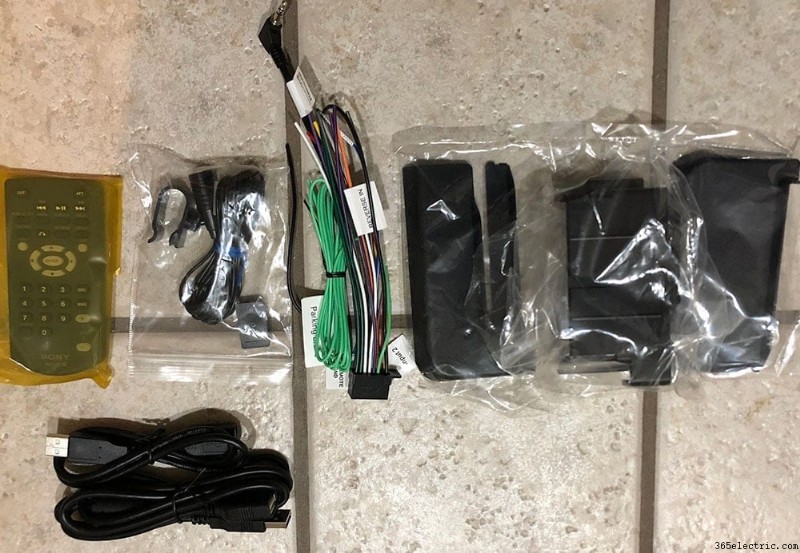
Conexión de sus arneses
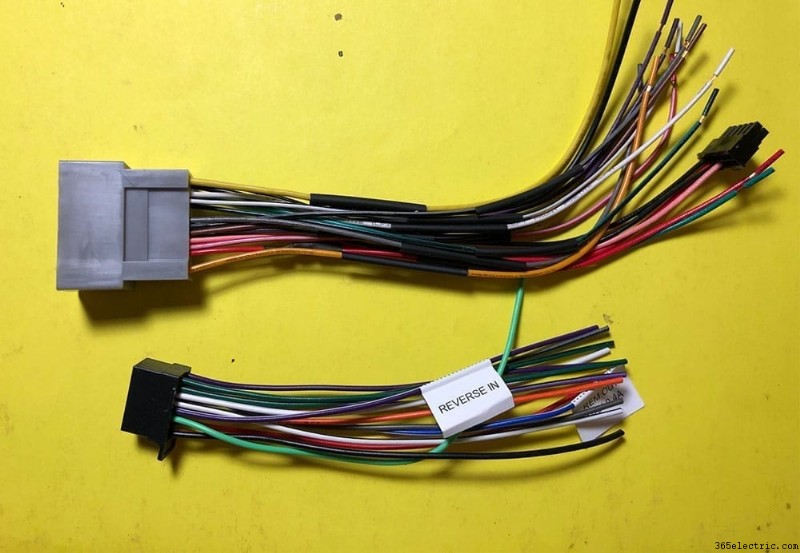
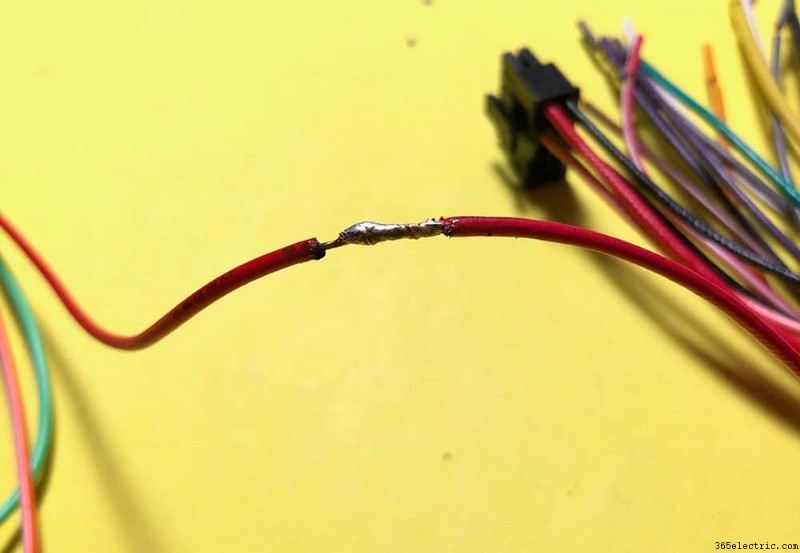
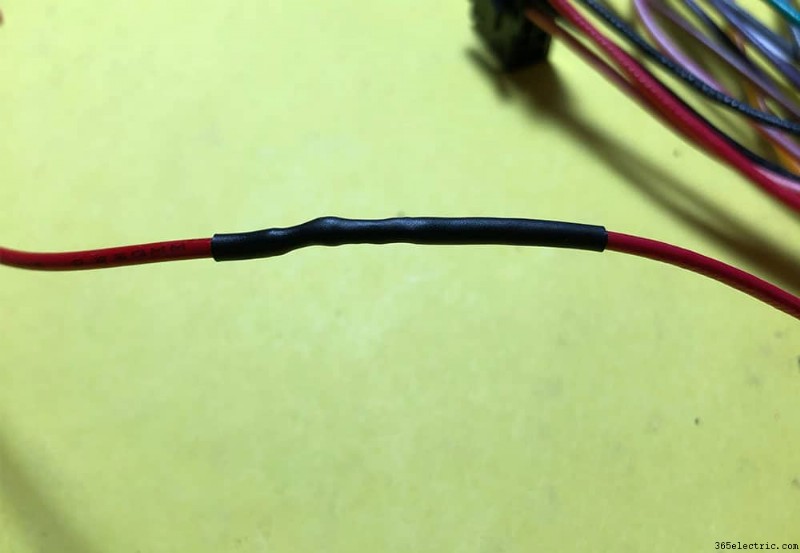
Una vez que haya terminado de inspeccionar sus piezas nuevas, extraiga el arnés de cables que vino con la unidad principal y el arnés que compró para su Honda. Hay muchas maneras de asegurar los dos arneses juntos. Mi enfoque preferido siempre ha sido soldar cada uno, seguido de una envoltura retráctil. Y en las imágenes que te mostraré verás esto. Sin embargo, también puede usar los crimpadores de alambre tradicionales que solo requieren una herramienta de crimpado y un pelacables o puede usar los conectores de sello de soldadura de alambre, que son mi próximo método preferido. A ambos me he vinculado en la sección de herramientas y piezas.
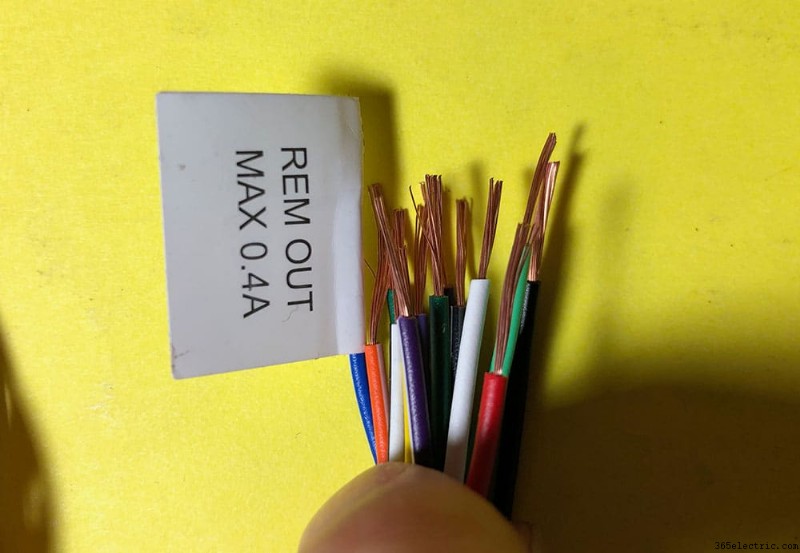
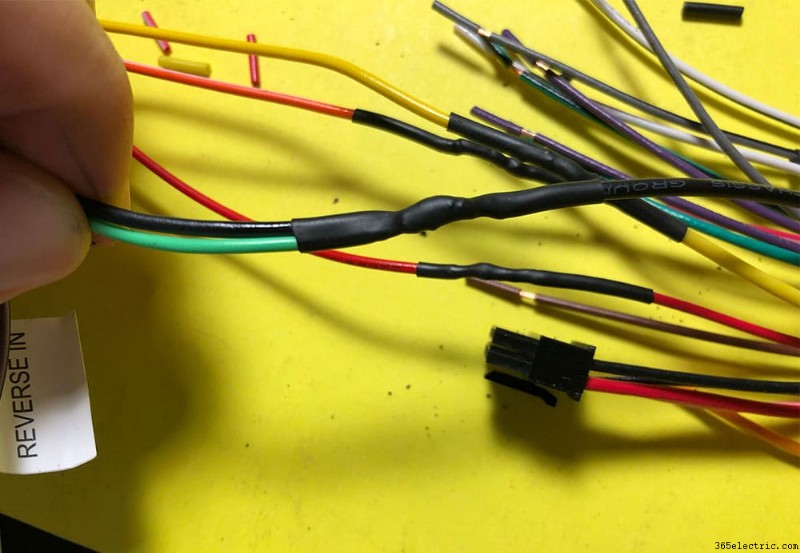
En este paso del proceso, tomará cada cable codificado por color en el arnés de la unidad principal y átelo con el color correspondiente/a juego en el arnés CRUX. Aquí hay algunas fotos para mostrarte cómo lo hice (nuevamente usando el método de soldadura).
Un par de cosas a tener en cuenta al conectar los arneses:
- Opcional:en lugar de conectar a tierra el cable verde claro a su freno de emergencia, también puede conectarlo a tierra directamente al cable de tierra principal (negro). Esto le permitirá utilizar cualquiera de las funciones de video que pueden estar limitadas solo cuando el vehículo está estacionado. Algunas de las unidades más nuevas usarán GPS, por lo que esto no siempre es un final, todo será una solución. Ver imagen a continuación.
- Habrá algunos cables sin usar:la iluminación y el atenuador (naranja y naranja con blanco) no se usaron para mí.
- La antena eléctrica (enchufe macho grande con un cable azul enganchado) deberá conectarse al cable azul correspondiente en el arnés CRUX.
¡Y voilá! Una vez que haya conectado todos sus cables, su arnés debería verse como se muestra a continuación y estará listo para continuar con la configuración de la unidad CRUX.
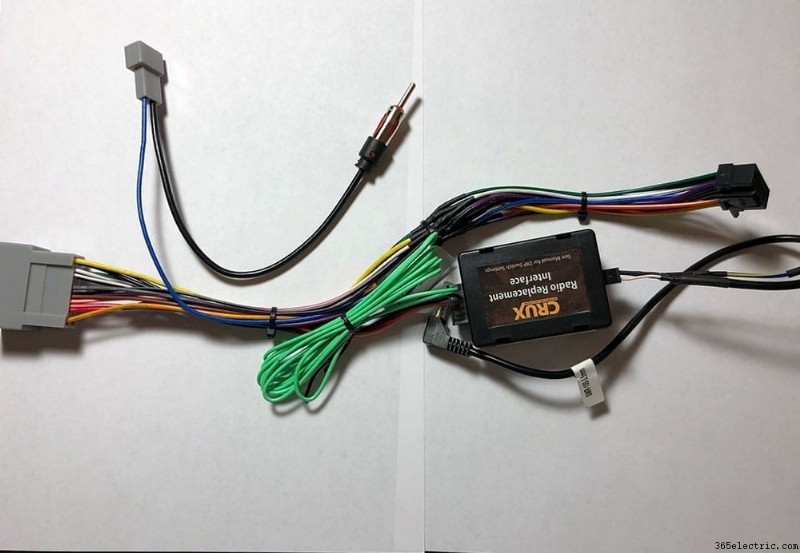
Configuración de su adaptador CRUX
La unidad CRUX era un poco cara pero valía la pena. Hay una serie de componentes alternativos que puede usar para adaptar los controles del volante a una aplicación del mercado de accesorios que son universales. Pero lo bueno de CRUX es que activa algunos interruptores de acuerdo con las instrucciones fáciles de leer y todo está preconfigurado. Con las unidades universales, debe programar la unidad principal para que coincida con la señal de su volante individualmente. Pensé que esto era más sencillo y, sinceramente, no valía la pena el dolor de cabeza de programar cada botón de mi volante para el control dentro de la unidad principal.
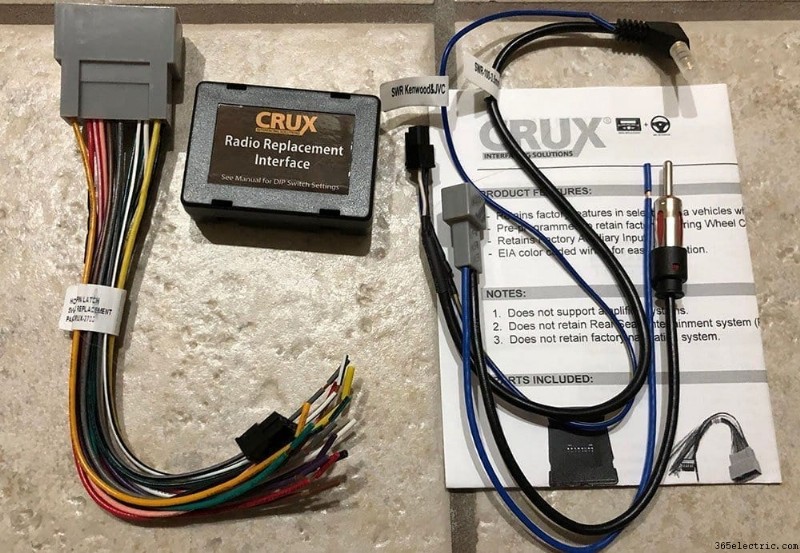
Para configurar la unidad CRUX (caja negra), voltéela para ver los ocho interruptores en miniatura en la parte posterior. Deberá asegurarse de que cada uno de estos esté en la posición correcta antes de instalar todo en el automóvil. Mire las instrucciones que vienen con para encontrar la configuración correcta. Si está utilizando una nueva unidad principal de Sony, la configuración será:
- Desactivado
- Desactivado
- Encendido
- Desactivado
- Desactivado
- Encendido
- Encendido
- Desactivado
Los primeros cuatro interruptores determinan el tipo de radio que está instalando. Entonces, si está instalando un Pioneer, por ejemplo, los interruptores serían:1. Apagado 2. Apagado 3. Encendido 4. Encendido. Los últimos cuatro interruptores serán los que determinen su vehículo. Todos los vehículos Honda tienen los mismos últimos cuatro interruptores. Aquí hay algunas fotos de cómo configurarlo junto con el manual.
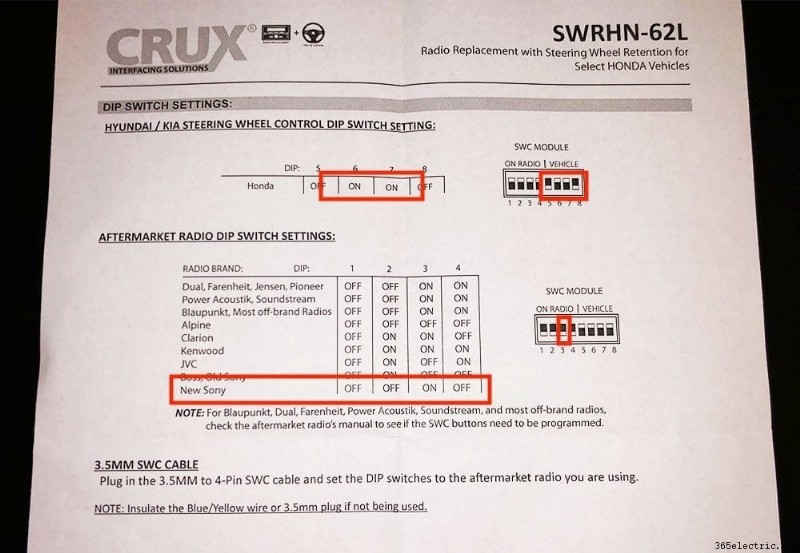
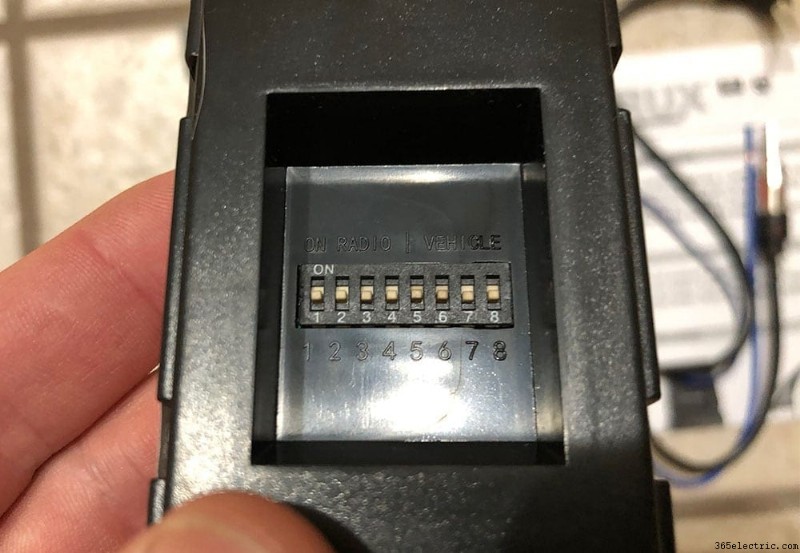
Preinstalación de su unidad principal
Lo siguiente que querrá hacer después de terminar toda la preparación del cableado es preparar el chasis de la unidad principal real para instalarlo en su nuevo kit de tablero. En mi sección Herramientas y repuestos, hay un kit de tablero de Metra. Este kit de tablero es el bisel completo que reemplazará el bisel existente que rodea su control de clima y los botones de radio OEM. Como lo tiene fuera del automóvil, es una tarea fácil instalar los soportes de montaje en su radio de mercado secundario y probarlo en el nuevo bisel. En mi caso, también tuve que configurar los ajustes de inclinación y altura porque el Sony XAV-AX8000 tiene un monitor de gran tamaño que no se sienta en el tablero (ver imágenes). Pero, para las instalaciones típicas de DIN simple y doble, es cuestión de colocar los soportes y asegurarse de que la profundidad de la unidad principal sea la esperada.
Para probar el ajuste, busque los soportes de DIN simple o DIN doble que se montan en el lateral de la unidad principal. Debe haber dos pares:uno para un chasis de DIN simple y otro para uno de DIN doble. Seleccione el apropiado para el tamaño de su nueva unidad principal. Atornille los soportes al costado de su nueva unidad principal, pero solo lo suficientemente ajustados para mantenerlos apretados bajo una ligera presión. Es posible que desee ajustarlo una vez que lo pruebe en su nuevo bisel.
Coloque la unidad principal en el bisel y asegúrese de que la profundidad de la unidad principal sea exactamente como le gustaría. Si está instalando una unidad principal de un solo DIN, la ranura inferior en realidad será un compartimento, por lo que deberá colocar ese compartimento en el bisel antes de insertar la unidad principal.
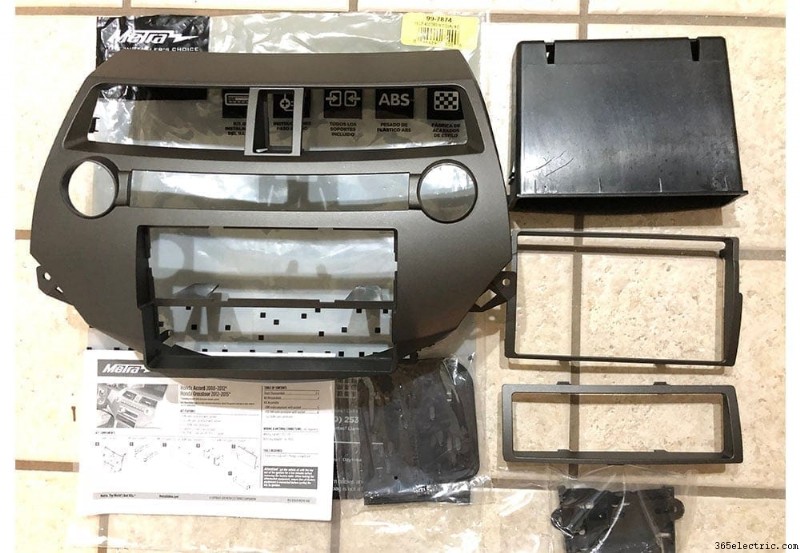
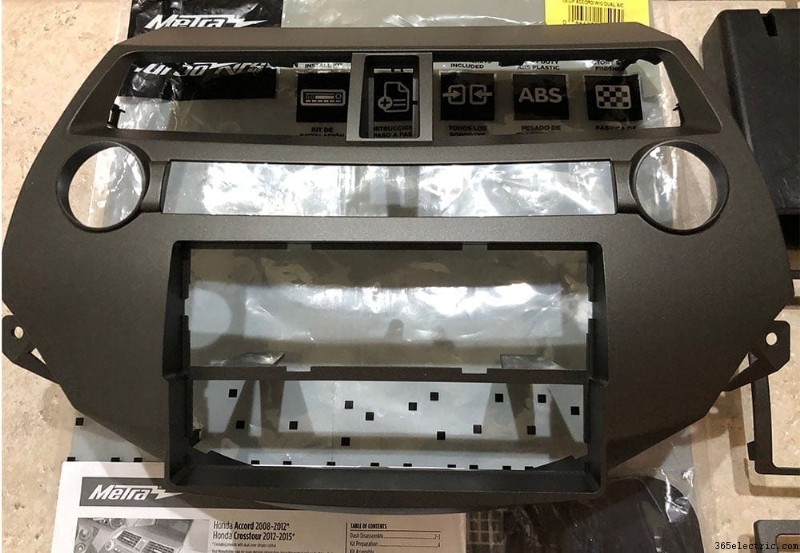
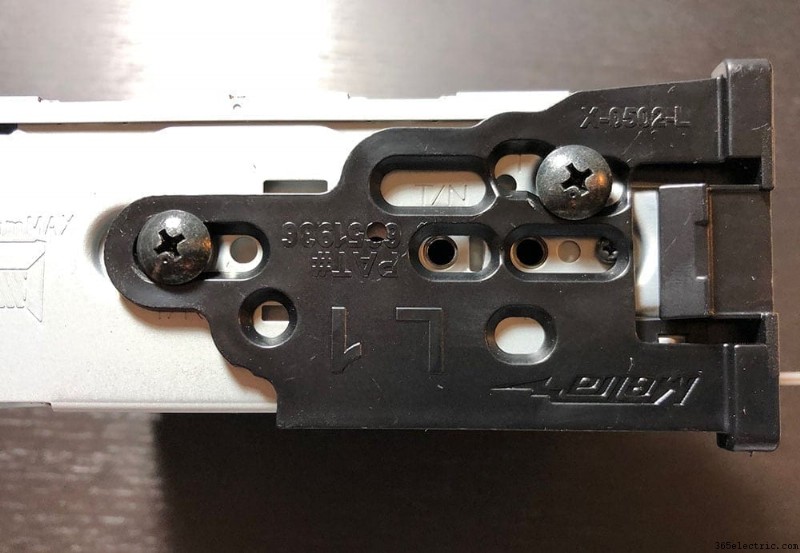
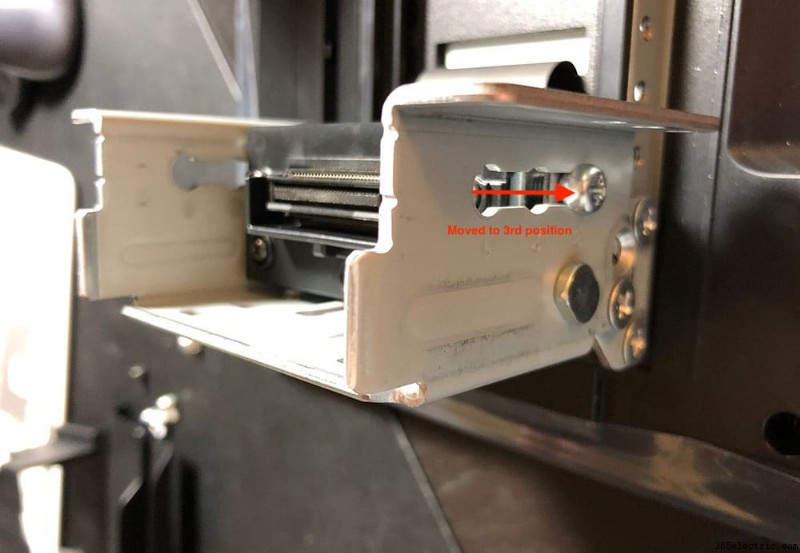
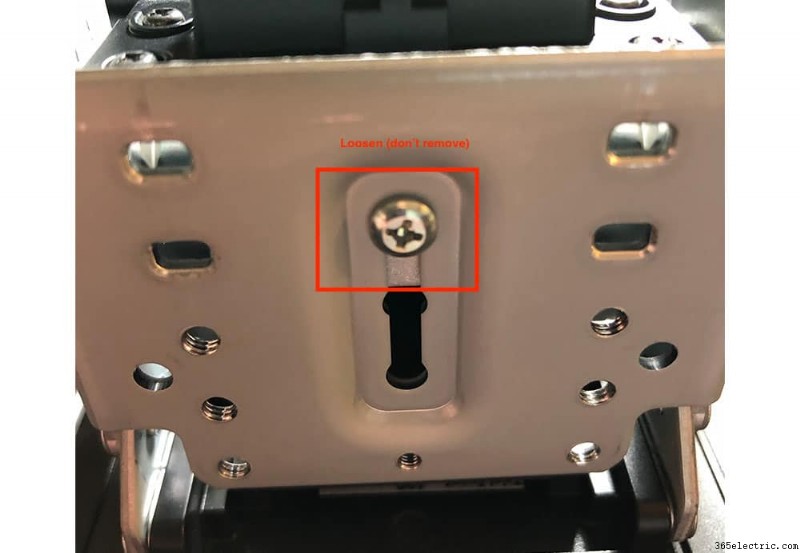
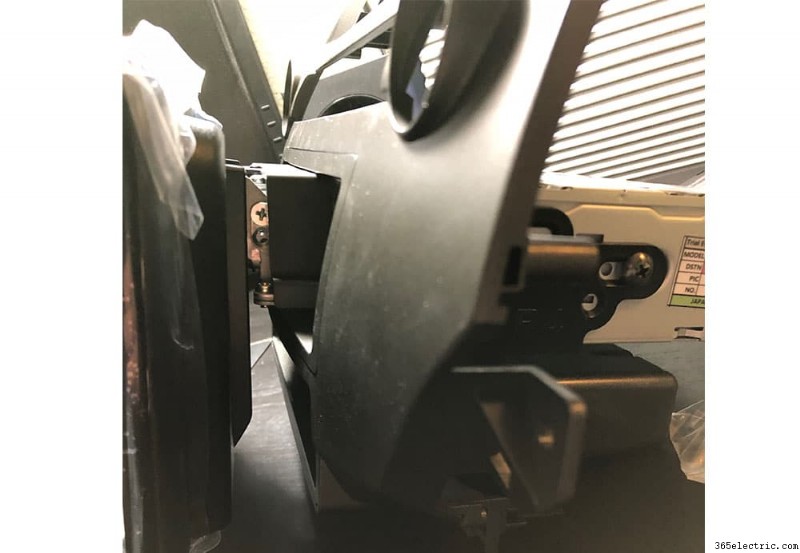
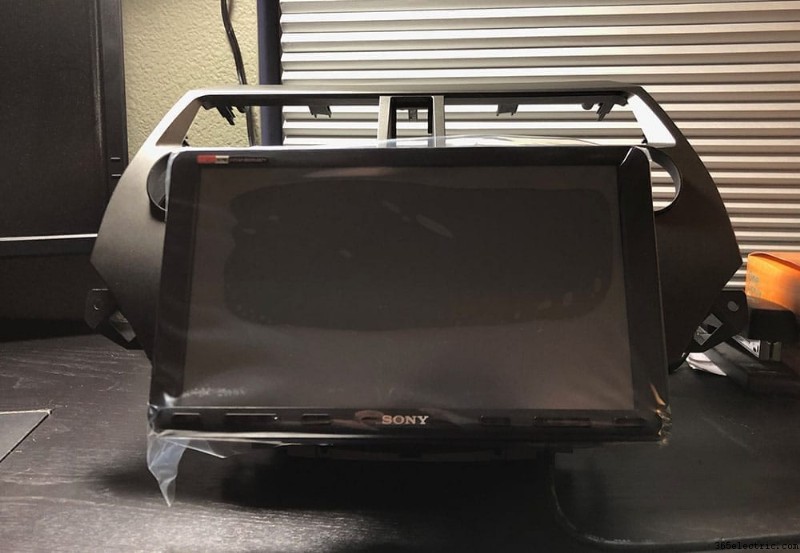
Una vez que haya terminado de ajustar la unidad principal y haya ajustado correctamente la pantalla (si es necesario) y los soportes del chasis, retire la unidad del marco y continúe con el siguiente paso del proceso de instalación.
Paso 2:quitar la unidad principal OEM de su Honda Accord 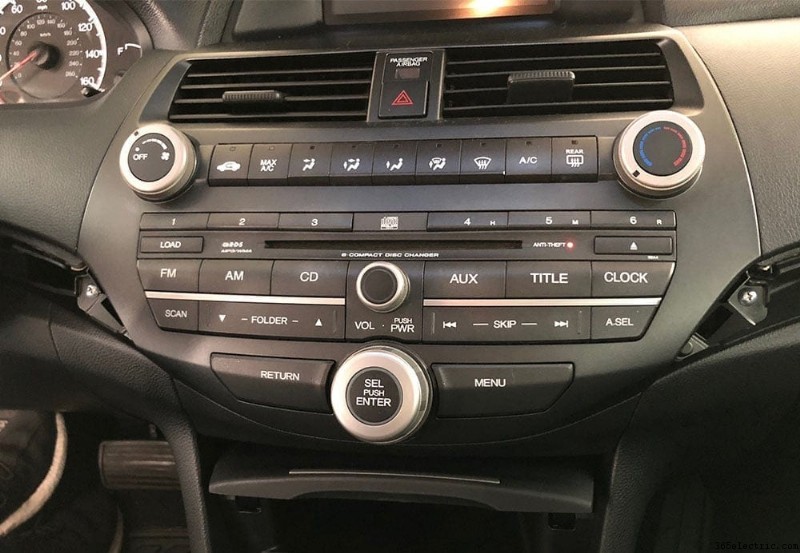
Eliminación de molduras de tablero
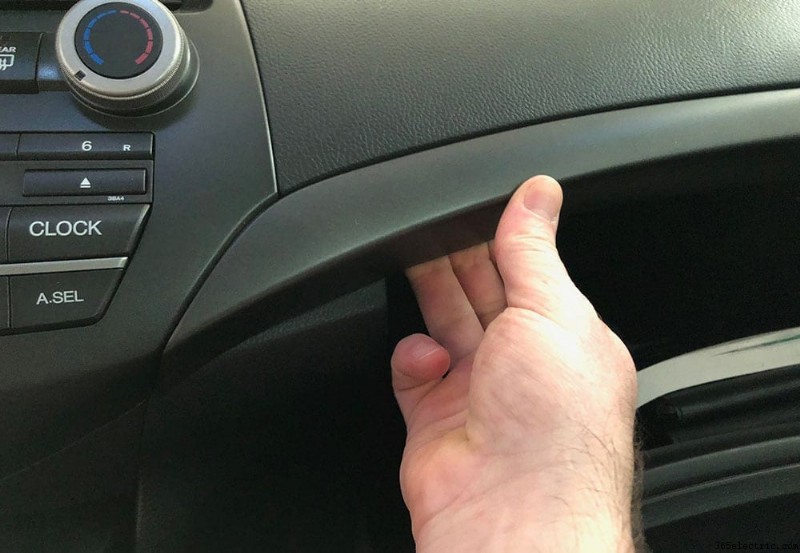
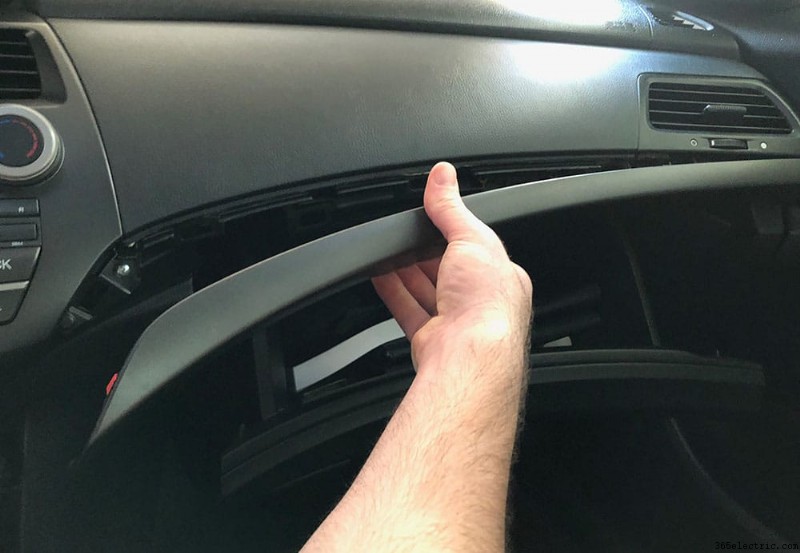
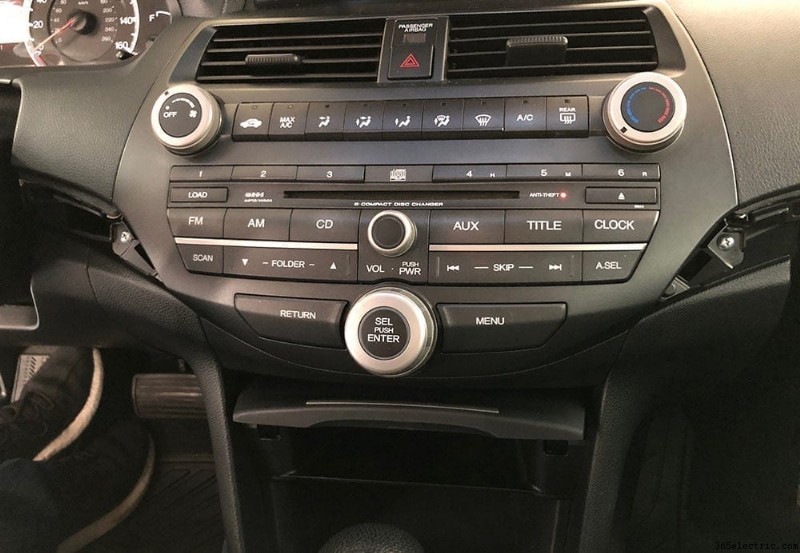
La primera moldura que quité es la moldura que está arriba de la guantera. Este es relativamente fácil:abra la guantera y agarre la parte inferior de la moldura con los dedos y tire hacia afuera, comenzando más cerca de la unidad principal en el lado izquierdo de la moldura. Uno por uno, extraiga los clips del borde de izquierda a derecha. Esto expondrá un tornillo en el lado inferior derecho de la unidad principal OEM.
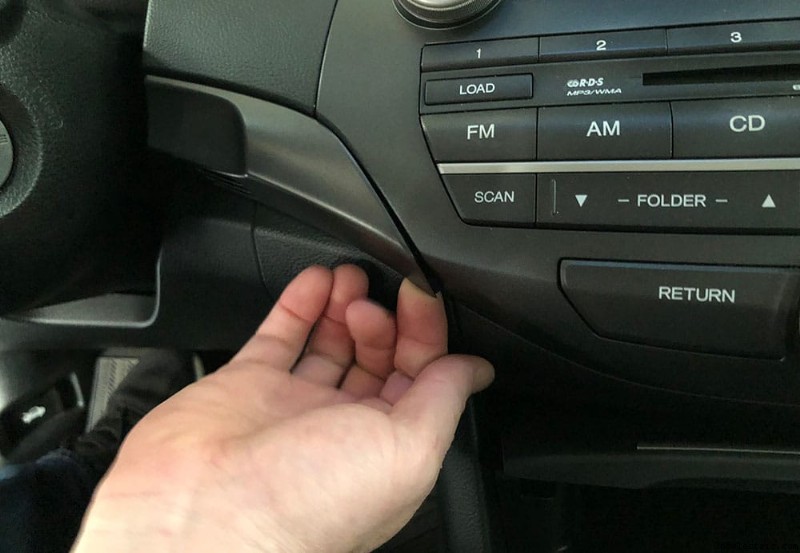
A continuación, muévase a la pieza de moldura pequeña entre la unidad principal y la columna de dirección. Este podría requerir una cuña para sacarlo. Recomendaría usar una herramienta de eliminación de molduras de plástico para no rayar la moldura. Pude usar mis dedos para jalar el borde de la moldura más cercana a la unidad principal, pero es posible que deba usar una herramienta adecuada para jalarla si es obstinada. Una vez que se quite esta pieza decorativa, quedará expuesto otro tornillo para la unidad principal.
Una vez que se hayan quitado ambas piezas de moldura y los tornillos estén expuestos, puede quitar los dos tornillos del costado de la unidad. Ahora, diríjase a la consola central y al cubículo para acceder a los 2 tornillos finales para quitar la unidad principal.
Extracción de la consola central y el cubículo
Para acceder a los dos tornillos finales en la unidad principal OEM de su Honda Accord, deberá quitar la moldura de la consola central y el cubículo. Para hacer esto, comience levantando la parte trasera de la moldura central. El mejor lugar para comenzar a hacer palanca es desde el interior de la consola central. Abre la consola central y comienza a empujar/levantar la parte trasera de la moldura central. Comience desde este punto y haga palanca suavemente hacia arriba hasta que comience a abrir los primeros clips de recorte. Es una pieza larga de plástico que se extiende desde la consola central hasta el área del cubículo, pero no hay tornillos que sujeten esta pieza. Avanza hasta llegar a la palanca de cambios.
Una vez que llegue a la palanca de cambios, deberá poner su automóvil en D1 para quitar la moldura central con mayor facilidad. Ponga el freno de emergencia con firmeza, luego cambie su automóvil a D1 y continúe quitando la pieza central hasta que se deshagan todos los clips. En este punto, todos los clips están abiertos y la moldura casi se habrá quitado, con la excepción de un enchufe de alimentación que alimenta el enchufe de accesorios en el compartimiento delantero. Retire el tapón tirando de él desde la parte trasera del panel. Una vez que se retira el tapón, puede maniobrar la pieza de moldura central alrededor de la palanca de cambios y sacarlo del automóvil.
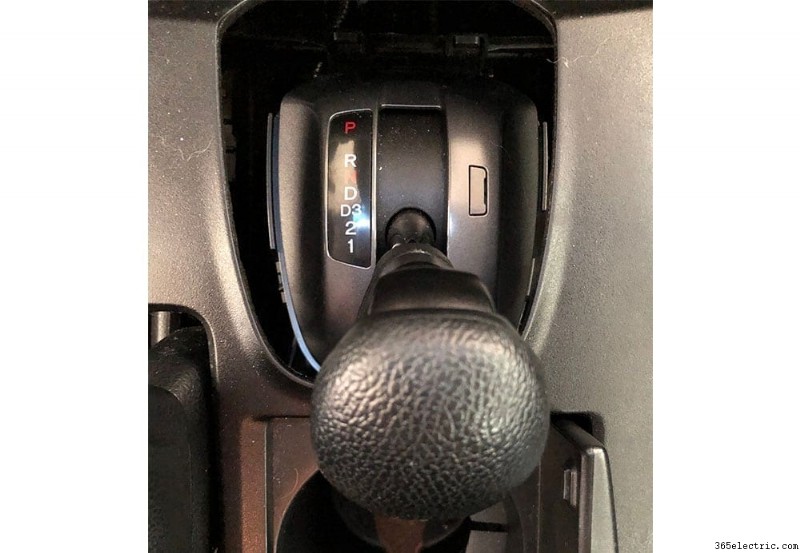
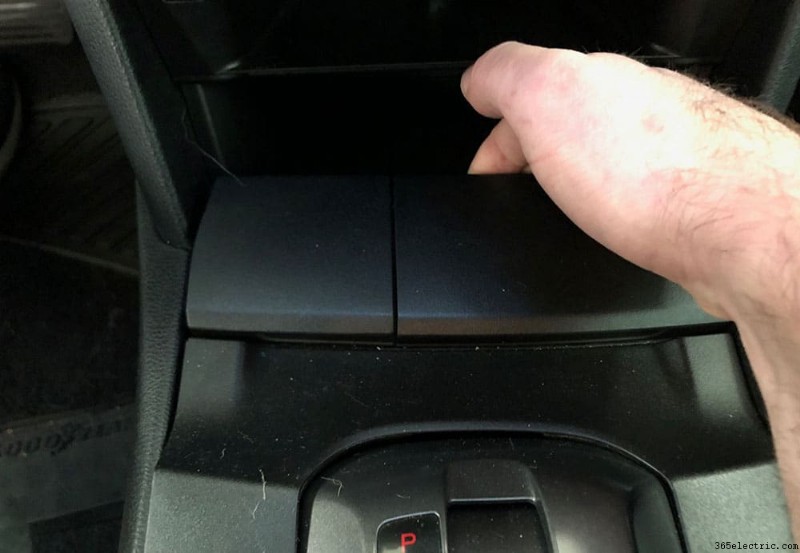
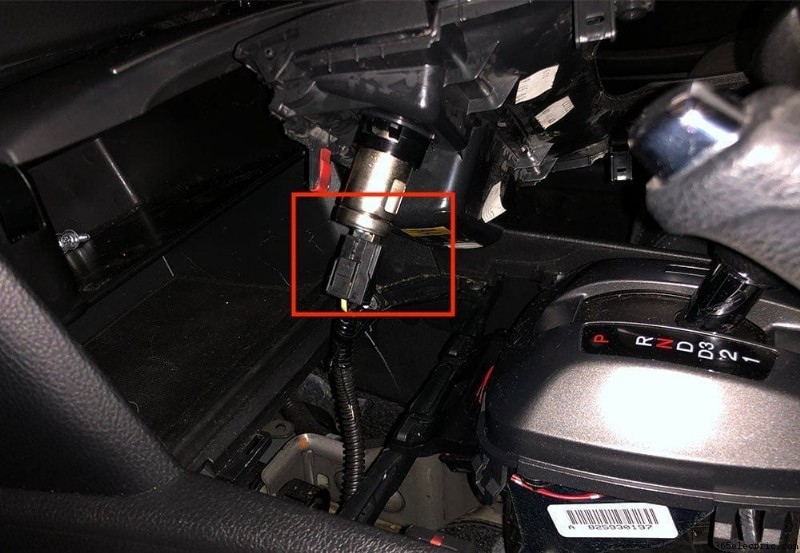
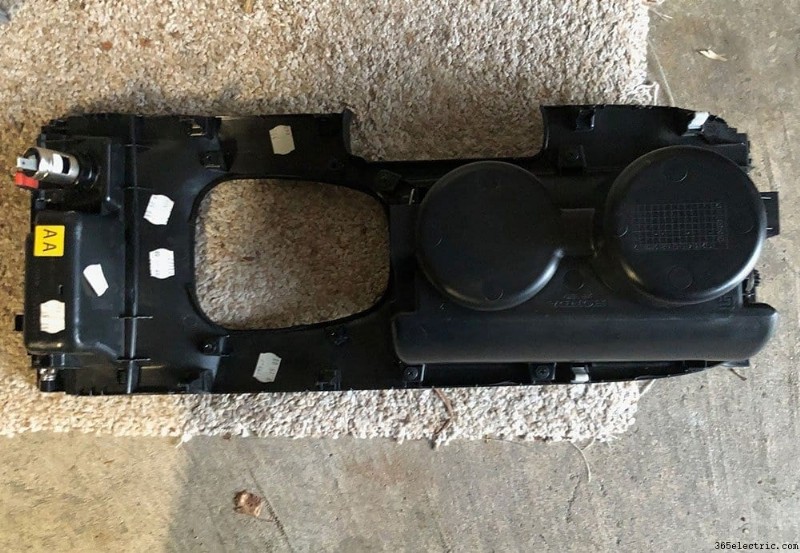
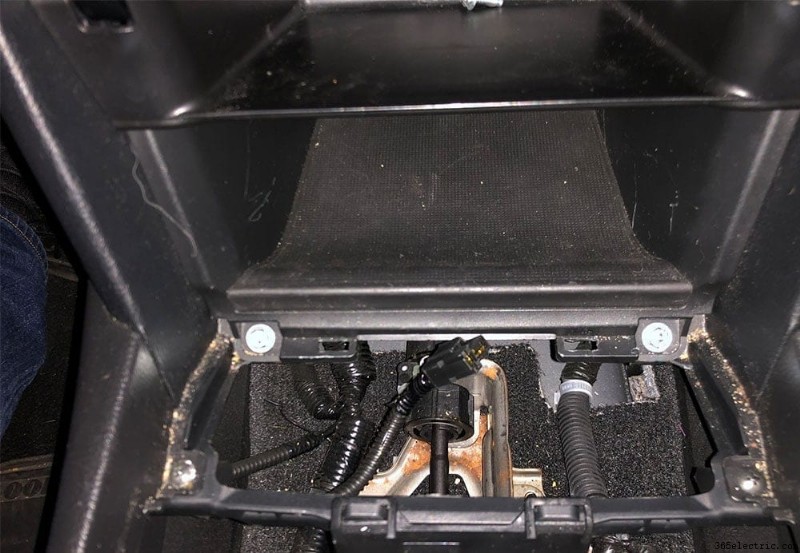
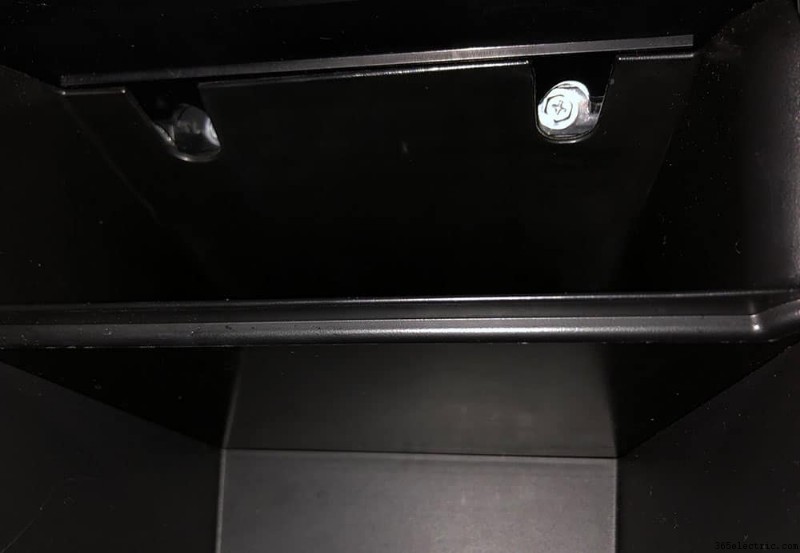
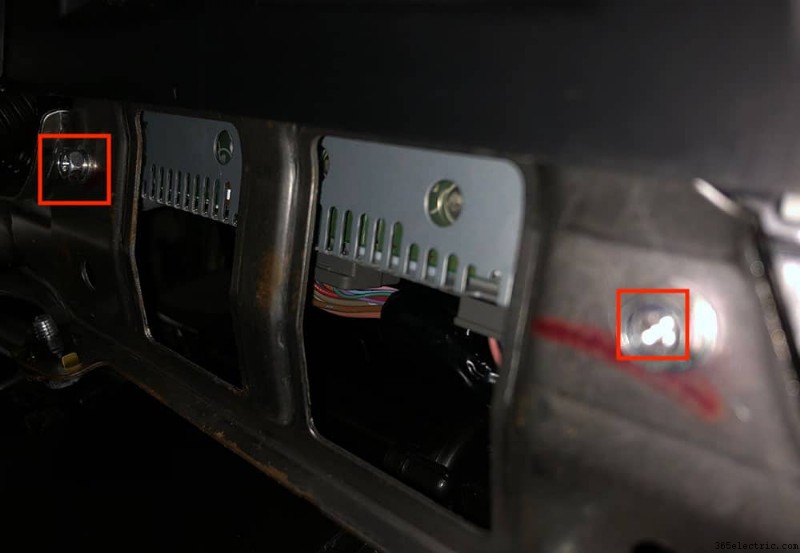
Ahora que ha quitado la moldura central, verá dos tornillos en la parte inferior del cubículo. Retire estos dos tornillos. Hay dos tornillos finales en el área superior del cubículo. These are difficult see and even more difficult to remove. Us a short screw driver to access and remove these two screws and then remove the cubby by pulling directly out.
Once you've removed the cubby, you'll now be able to access the final two screws to pull your OEM head unit from within the area above the cubby.

Removing the Head Unit and Components
Now that you've removed all of the head unit screws, you can begin removing the head unit. In addition to screws, the unit also has clips that are holding the plastic trim in. Start removing the head unit by wedging the bottom edge with a flat surface and begin to pry upwards, gently. You'll hear the clips pop and you should begin to be able to remove the unit. Once the unit is loose, unclip all of the wiring that is connected to the head unit, climate control and emergency lights switch and pull the unit out of the dash.
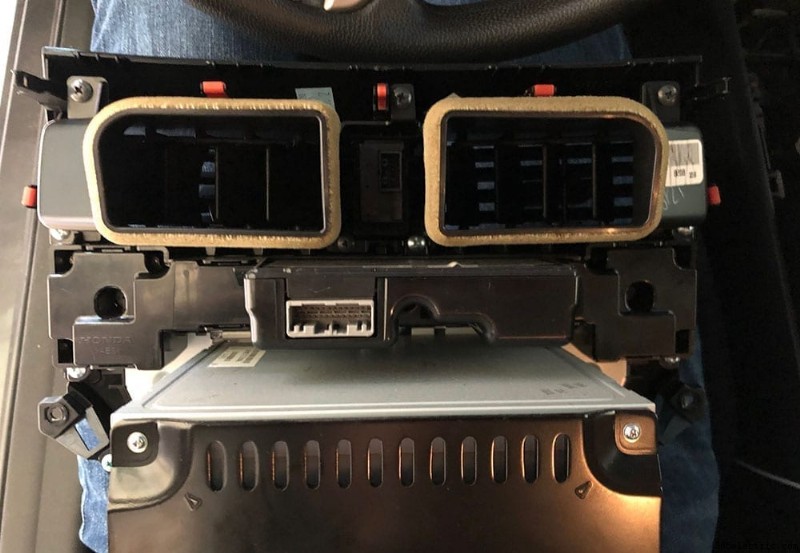
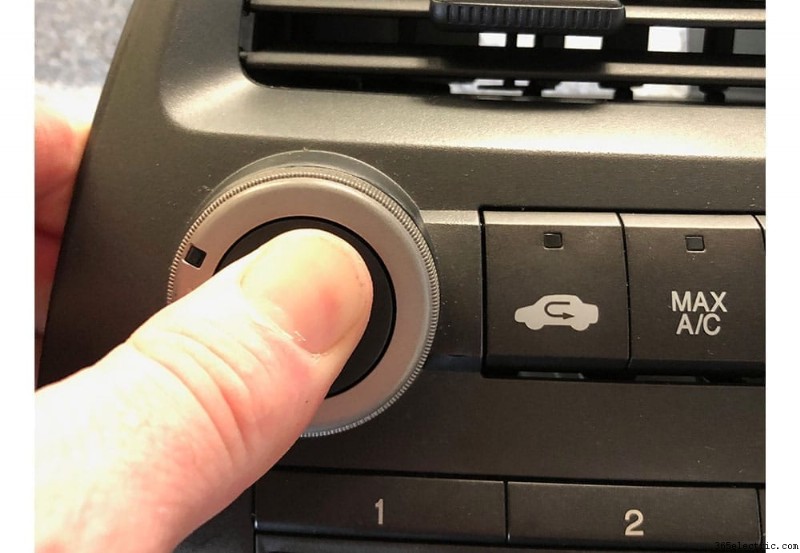
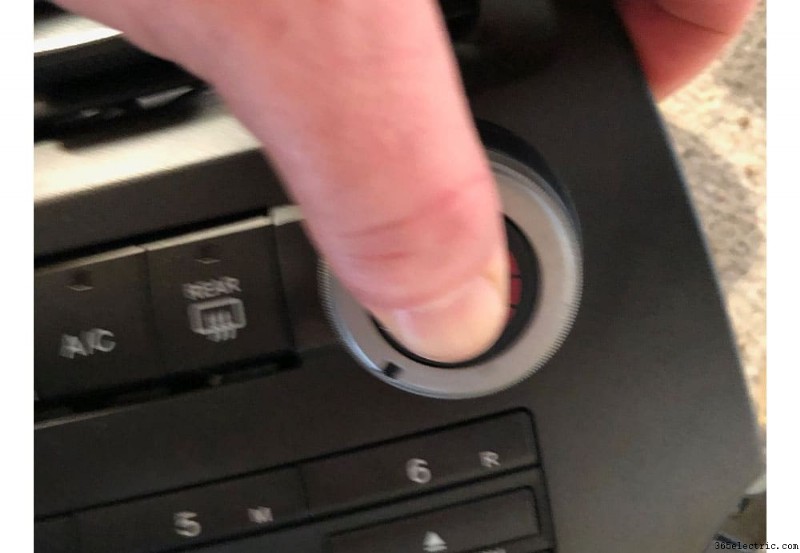
The dash trim has a number of components that you'll need to reuse and carry over to your new Metra dash kit. This includes the vents, climate control and the emergency button switch. To get access to these, you'll need to remove the head unit from the plastic trim. Remove the head unit by removing the screws in the back, then move to the climate control unit. The climate control unit also has a few screws to remove. Once you've removed those screws you'll need to pop off the two control knobs on the face in order to fully remove the climate control unit. See pictures.
The hazard/emergency button has a few clips holding it in. Gently pry them apart to push the button out towards the face of the trim.
Finally move to the vents. Remove the final screws in the old trim and pull the vents off. The remaining plastic dash trim should be completely empty and you should now be able to place the components back into your new aftermarket dash kit.
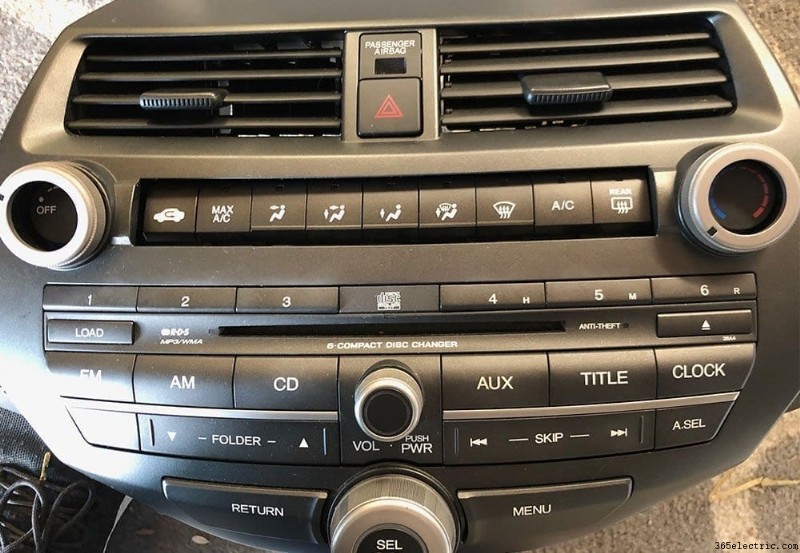
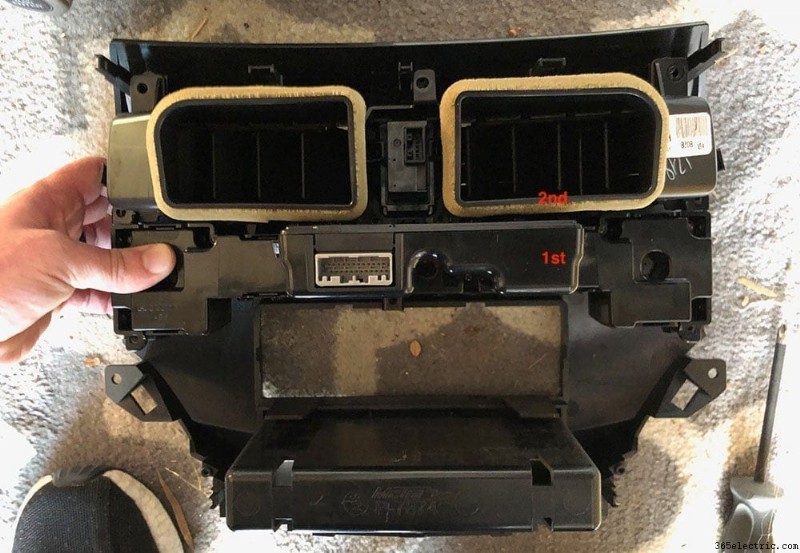
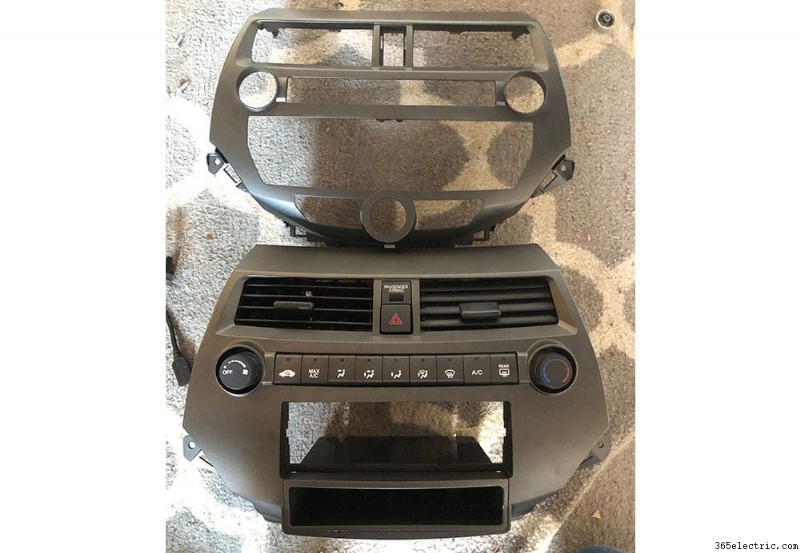
Step 3 – Re-installing Your New Aftermarket Head Unit
If you're not installing an aftermarket backup camera, you're now ready to reinstall your aftermarket dash bezel and new head unit back into the car. If you are installing a backup camera, see the Installing a Backup Camera section.
Wiring Your Microphone
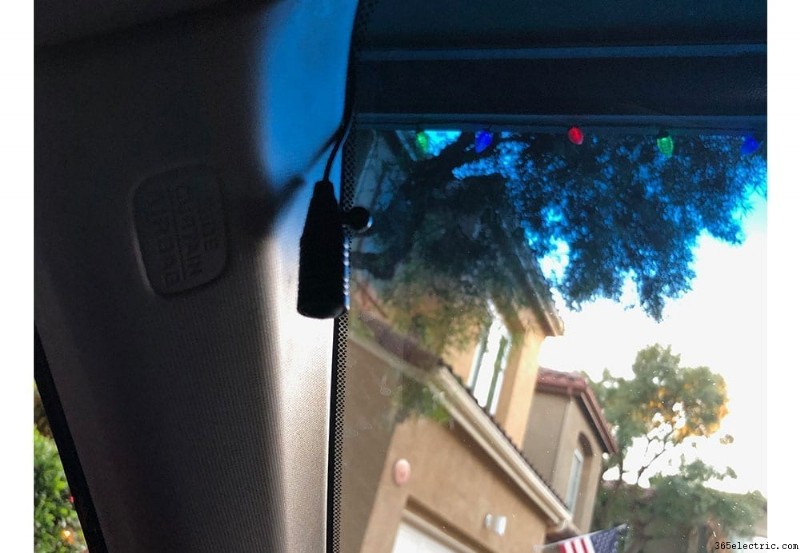
Before you put the head unit back into the car, plug the harnesses in and secure it you'll want to wire the microphone up first if you have one. I normally place my microphones in the headliner closest to the driver side front pillar bordering the windshield. So this walk through is based on that position.
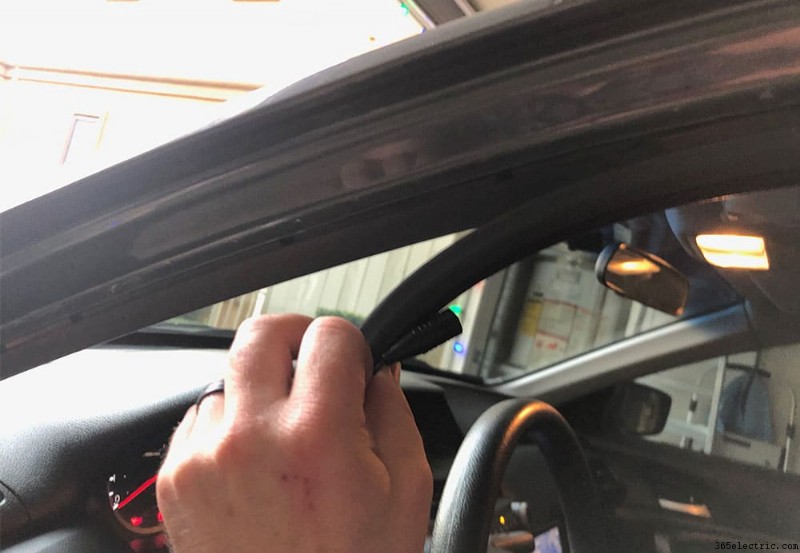
Start by removing the plastic cover on the left hand side of the dash (see image). This panel has a few clips, start by gently prying the corner to the right, closest to the vent. Once this is removed, you'll have access to run the microphone wire through and underneath the dash to the stereo compartment along with through to the pillar of the car to the headliner.
Gently pull the door seal closest to the panel that you just removed, enough to push the microphone wire behind it, in between the metal frame and the dash panel. Run the microphone wire up through the pillar cover and around through to the windshield facing side of the pillar. Clip the microphone to the headliner.
On the other side of the microphone wire, run it through the panel that you pulled, behind the dash and out through the stereo compartment where the head unit will go back in. You can zip-tie the wire behind the dash to the existing wire harness so that it doesn't drop down into your feet. Once you've ran the microphone wire into the stereo area, leave about 12 inches of slack and then bundle and zip tie the slack together so that your wire doesn't look like spaghetti behind the stereo and get in the way of the install. I zip tied it to the metal sub frame behind where the stereo will sit.
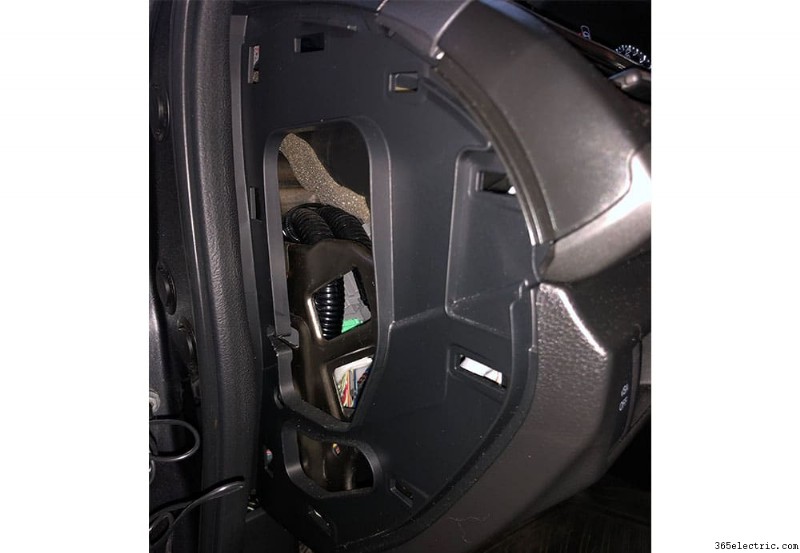
Install the Aftermarket Bezel and New Head Unit
Once the microphone is wired, you can begin to install your new bezel and head unit. Start with the wire harnesses. Clip your new aftermarket wire harness into the OEM harness. There are two clips – the primary that houses all of the wires you joined in the preparation phase and then the power antennae which has a blue wire and a wire with a male plug on it.
At this point, you should have your bezel WITHOUT the head unit installed. Keep the new aftermarket head unit out of the bezel until you've installed the bezel into the car. Install your bezel by placing it back into the dash the same way you removed it. Be sure to re-connect the hazard/emergency lights button and the climate control. Pull the microphone wire, the head unit harness (black plug) and the CRUX male plug for your steering wheel controls all out through the space in your bezel in which your head unit will be installed. Once your wiring is accessible through the bezel, place the single or double din trim piece into the bezel before you secure the new head unit. This is a slim piece of plastic that comes with the bezel to basically frame the outside of the head unit once it's installed.
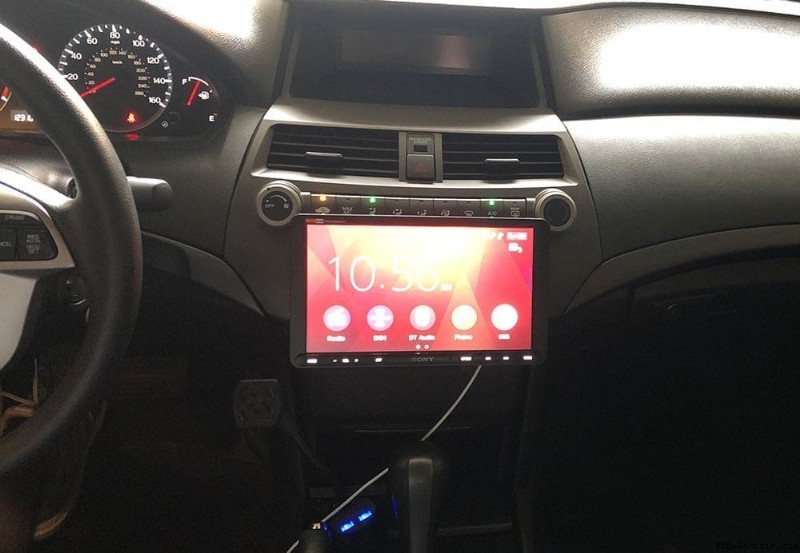
Now, take your new aftermarket head unit and plug in all of the wires that you should have hanging out through your bezel. Once all of the wires are plugged in, place your head unit into the bezel until it ‘snaps' into place. Voila!
Test Your New Head Unit and Reinstall Trim
Before you screw your bezel back into place and re-install the trim, be sure that your new stereo works! Turn the car on and run through the key features – make a phone call, connect your usb device, turn on the radio, etc.
If all checks out, start to replace all of the trim back where it came from. In my tools and parts section, I recommended buying some extra trim clips. I wasn't able to find all of the clips from my center console trim so I purchased extra and replaced the missing ones before I re-installed all of the trim pieces. I recommend doing this to prevent (or help prevent) vibration noises. Before placing your trim and center console trim piece back on, I recommend pulling all of the clips and placing them directly onto the trim piece you're re-installing. Leaving them in the clip hole instead of on the trim itself makes installation much more challenging. If you place them back on the trim piece they just pop back in like they should.
Additional – Backup Camera Installation
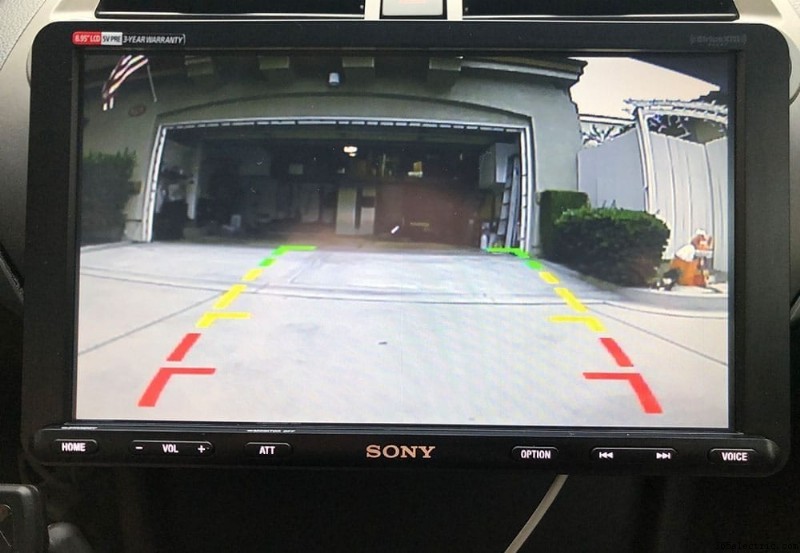
If you're a Honda Accord owner without a backup camera and are looking to add an aftermarket camera to a supporting aftermarket head unit, we have you covered. In addition to the head unit that we installed, we also added a backup camera. In this section, we'll walk through the steps that we took to run a wired backup camera in a 2008 – 2012 Honda Accord.
If you're installing a backup camera at the same time as a new head unit, continue with this step after you are done with Step 2. If you're installing a backup camera to an existing head unit that supports a backup camera feed, complete Step 2 through the “Center Console &Cubby Removal” section first.
For our installation we used an AUTO-VOX Cam 6 license plate camera, but this walkthrough should apply for any other license plate camera or universal wired camera.\
Wiring Your Backup Camera
A wired backup camera requires you to wire reverse signal power and ground, along with a signal wire (typically an RCA that connects to the back of your head unit).
The first (and most time consuming) step is to run your camera's signal wire from the dash to the rear of your car. Start by feeding the signal wire through the bottom of the dash near the driver petals into the head unit area of the dash. Feed the wire through the opening where your head unit will be installed and leave about 12″ of extra cable for when you plug your head unit back into the harness and other signal wires.
Run the wire underneath the driver side of the dash above the petals. I typically will use zip ties to secure the signal wire to an existing harness so that it doesn't become a hazard while driving. Loosen the door seal that's to the left of the kick panel (panel that's closest to the driver's left foot while seated) and run the wire along the left hand side of the panel underneath the seal.
Next, you'll need to loosen the panel along the bottom side of the door along with the panel along the driver side of the rear seats. If you have a four door, you'll need to run the wire along the column between the front and rear doors and also loosen the panel along the bottom side of the rear door to run the wire.
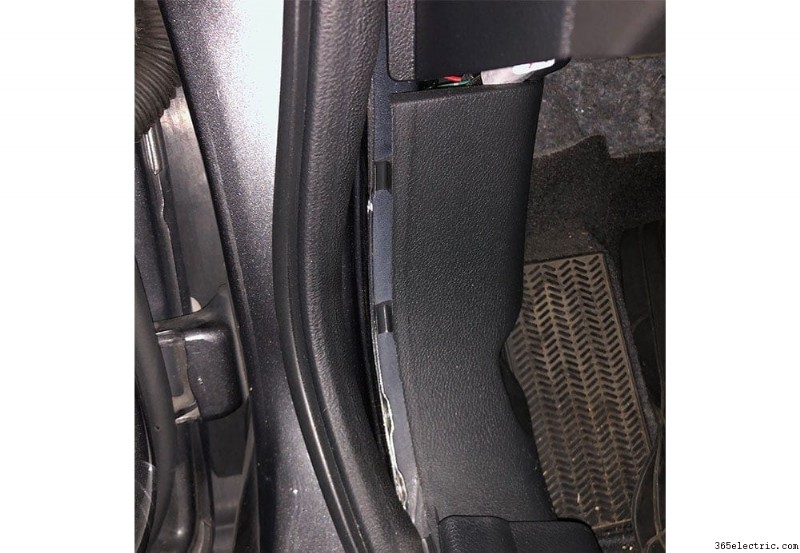
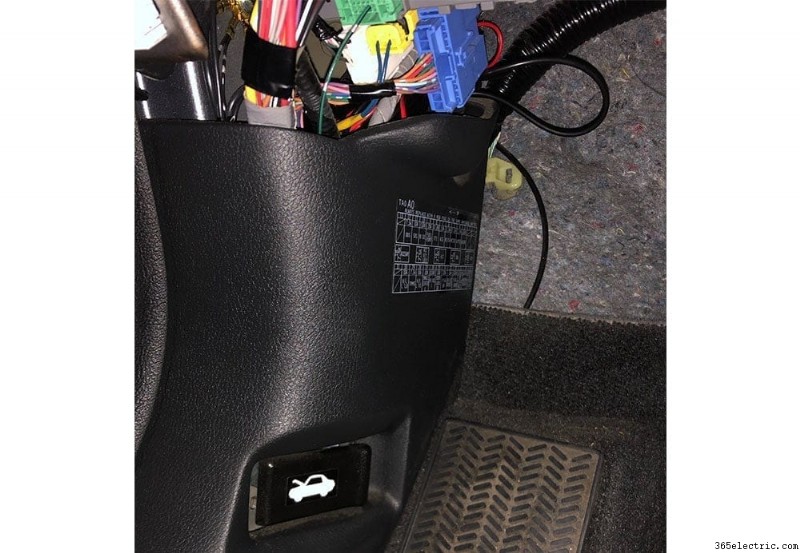
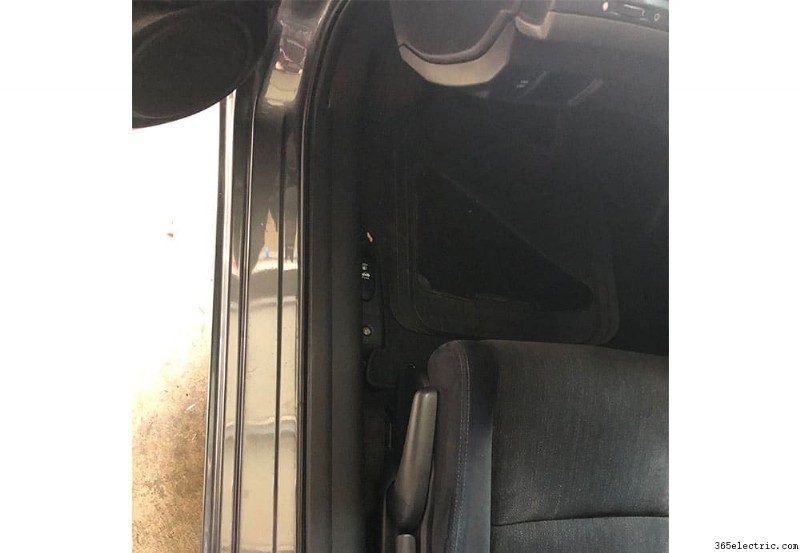
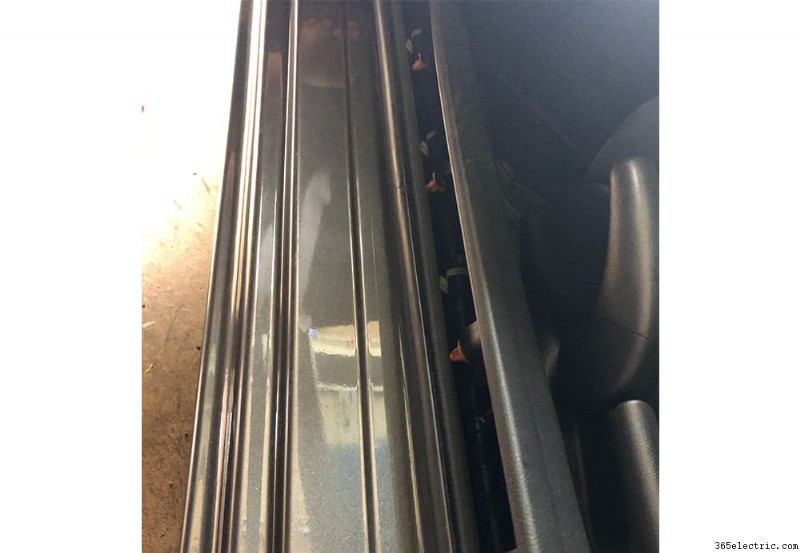
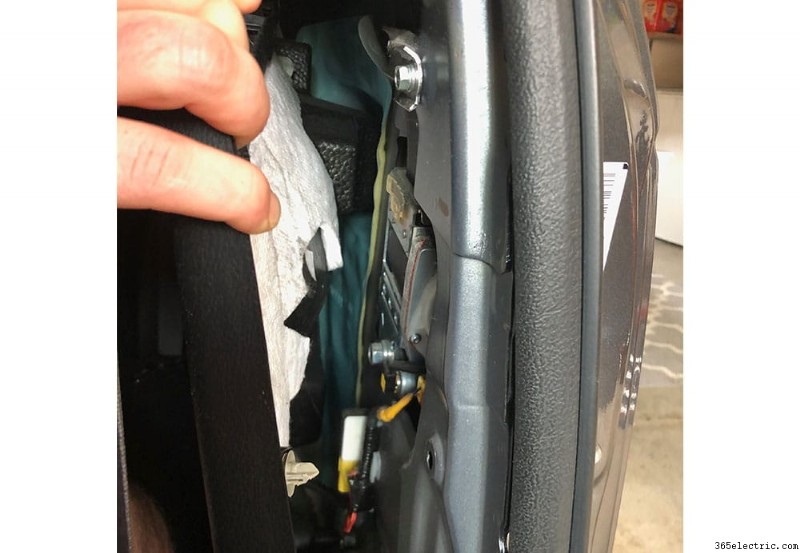
Once you've run the signal wire through the driver side floor panel, you need to wire it through to the trunk. To do this, fish it through the panel between the rear seat and the trunk. Start from the trunk side and run your fisher through the trunk into the panel that you loosened earlier.
Hook the camera signal wire to the fisher and then slowly pull the fisher through the panel to the trunk.
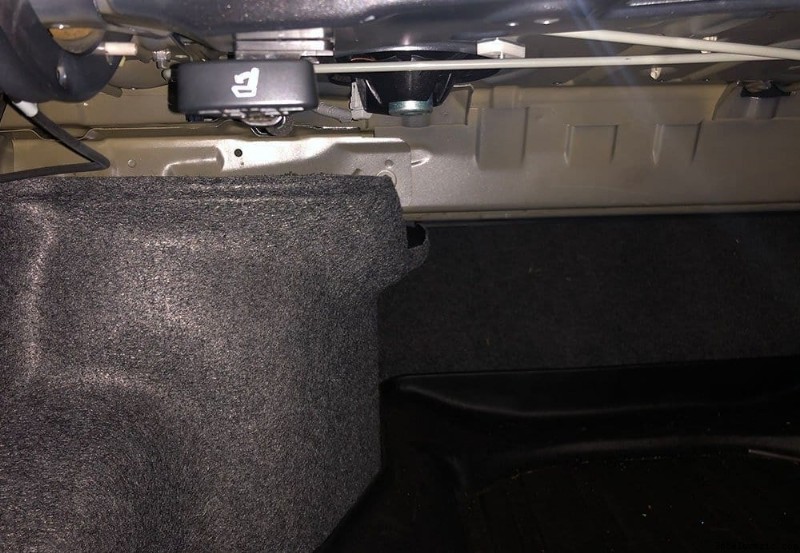
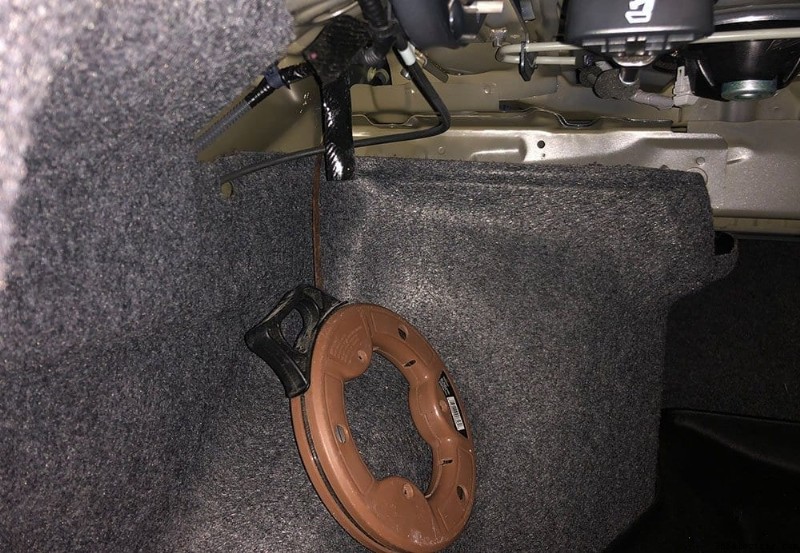
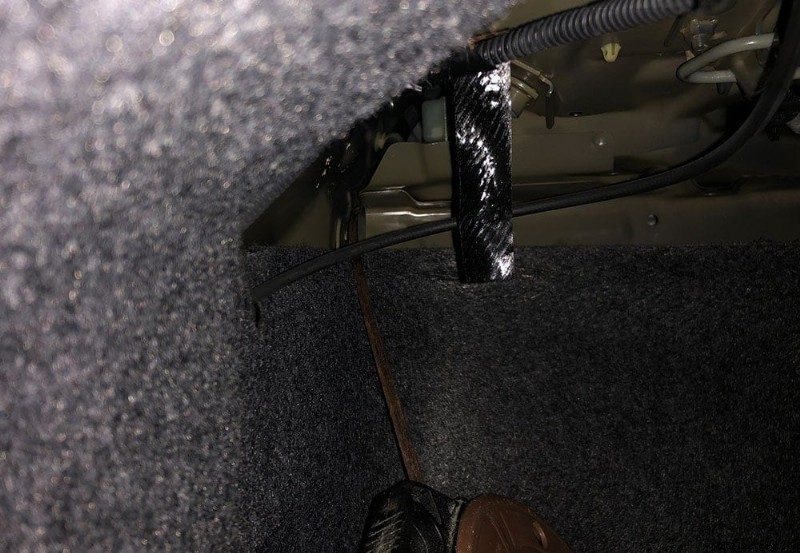
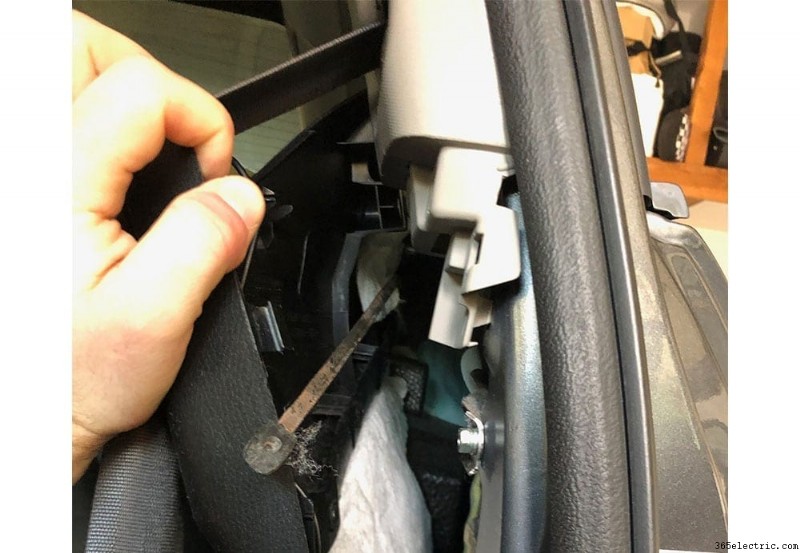
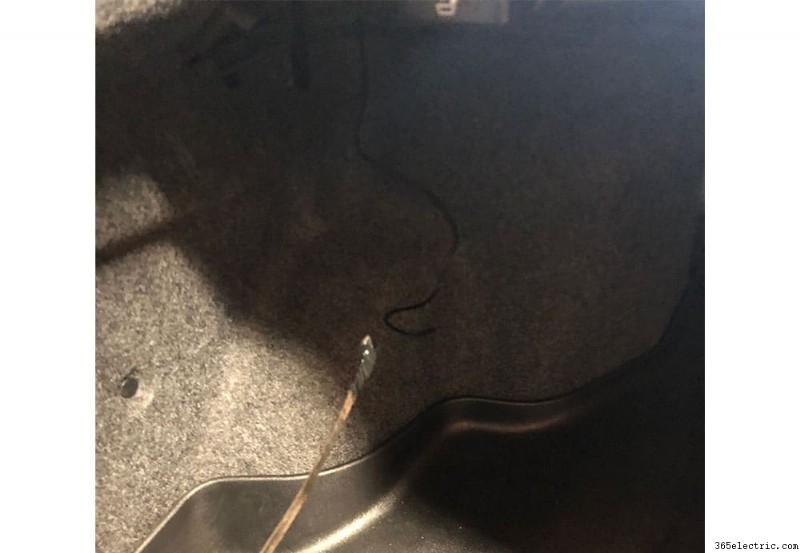
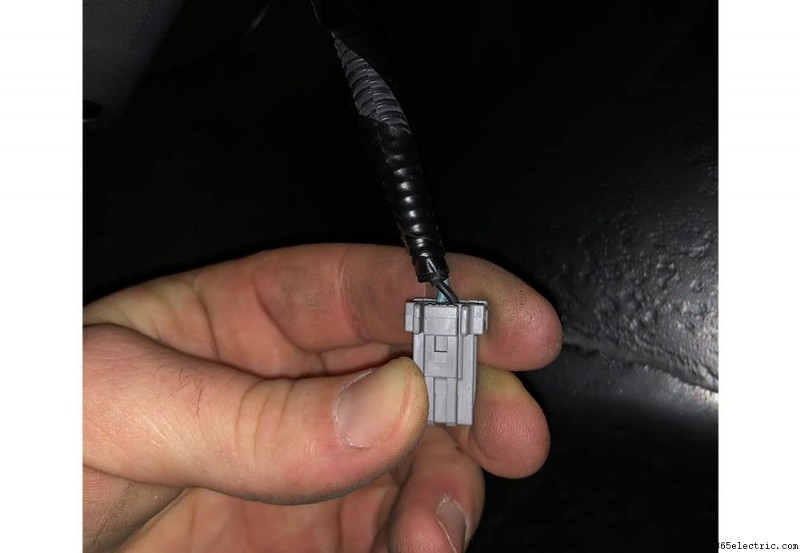
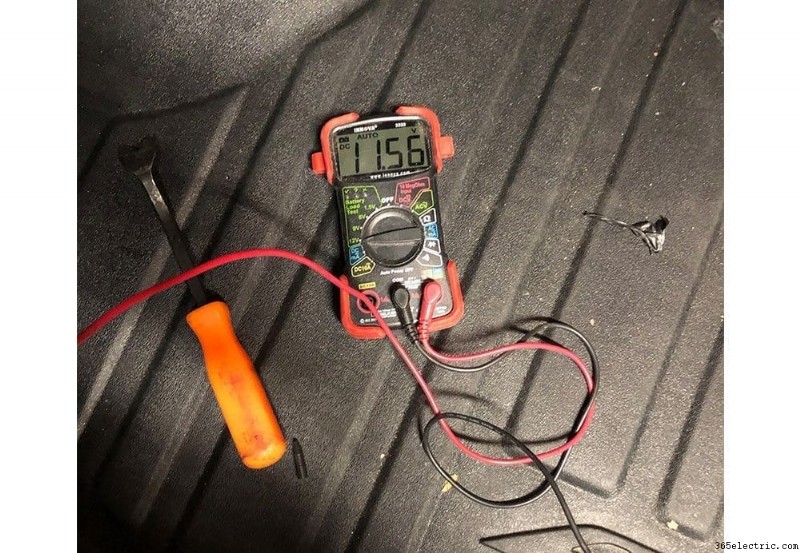
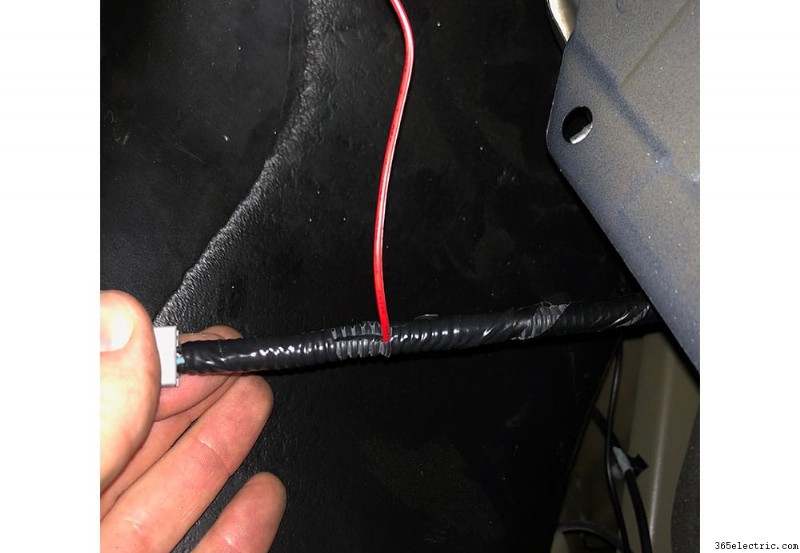
Most cameras require a signal/power wire to tell it when to turn on and when the car is in reverse. The easiest way to signal the camera when the car is in reverse is to tap into positive wire in the reverse light. To do this, you'll need to pull the panel inside the trunk to get access to the tail light.
Pull the clips to the panel and remove the panel to gain access to the tail light plugs. I tested the plugs with a voltmeter while the car was in reverse in order to determine which wire was positive and tapped into the wire for the positive source for the camera. You can use a wire tap to do this. For the negative wire, I used an existing ground that was bolted to the frame behind the plastic panel closest to the bumper.
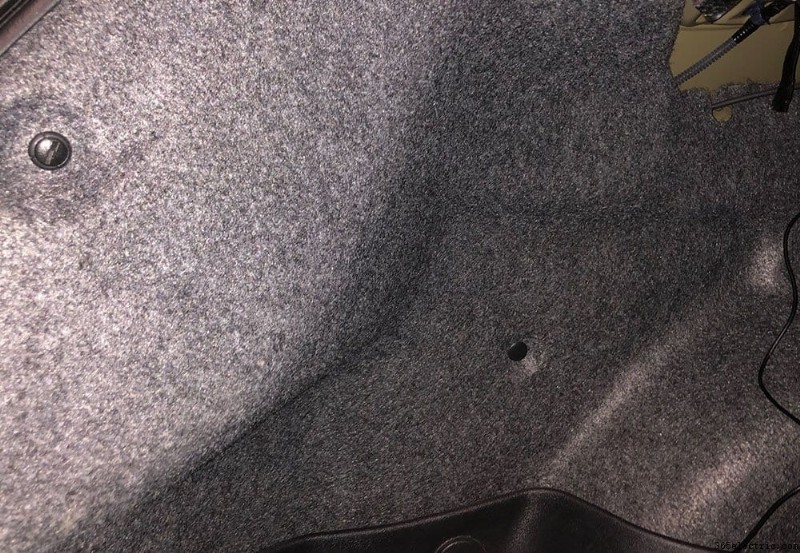
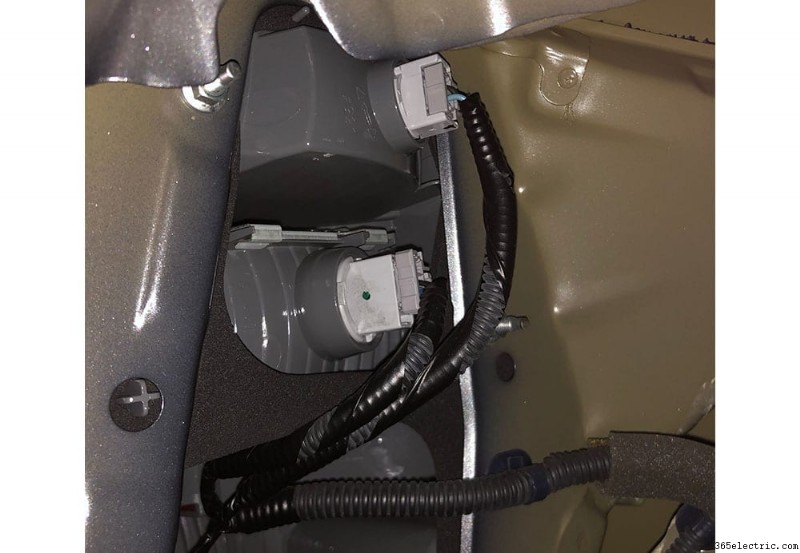
Installing the Camera
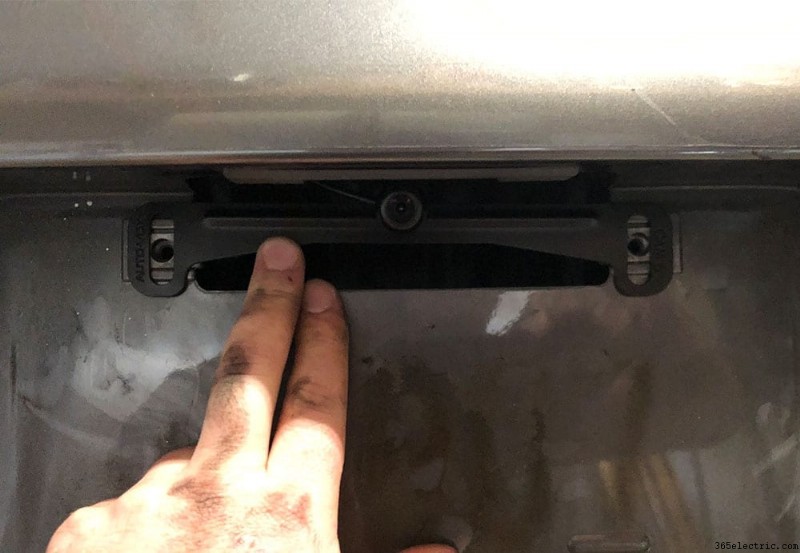
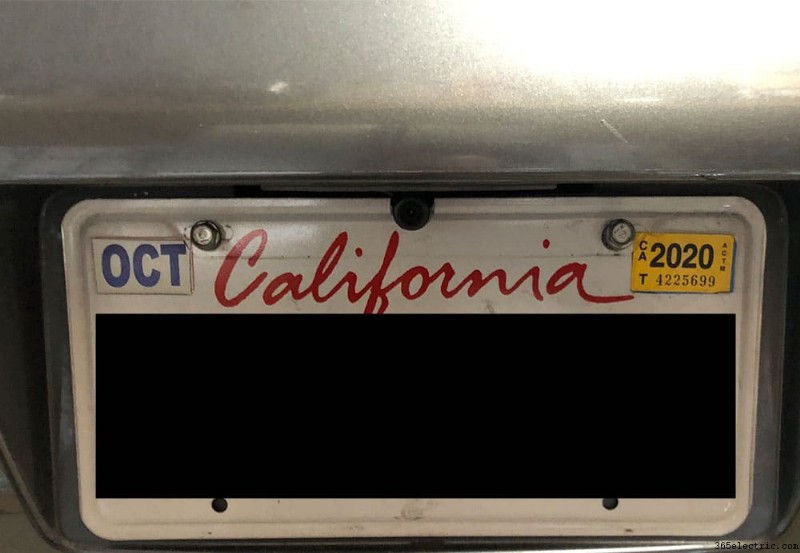
Since I used a license plate camera, there was no need to drill holes. If you choose a camera that does require custom mounting you'll need to find a good location for the camera and mount it. I would recommend above the license plate.
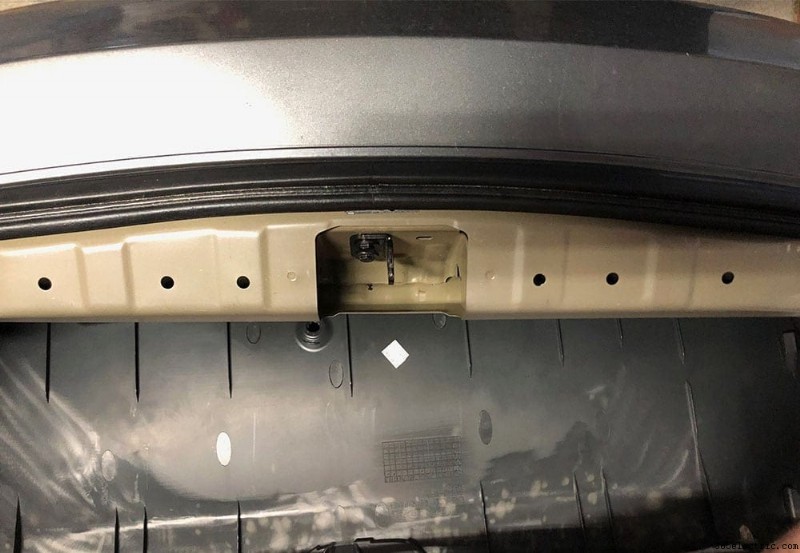
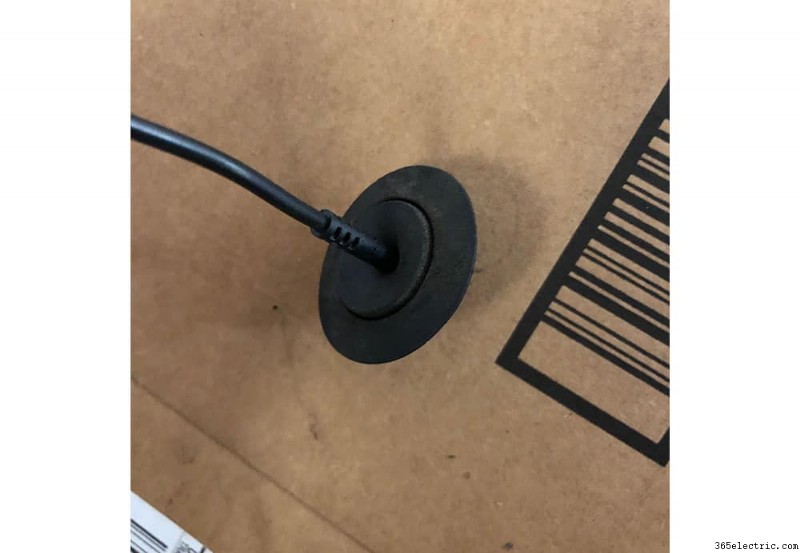
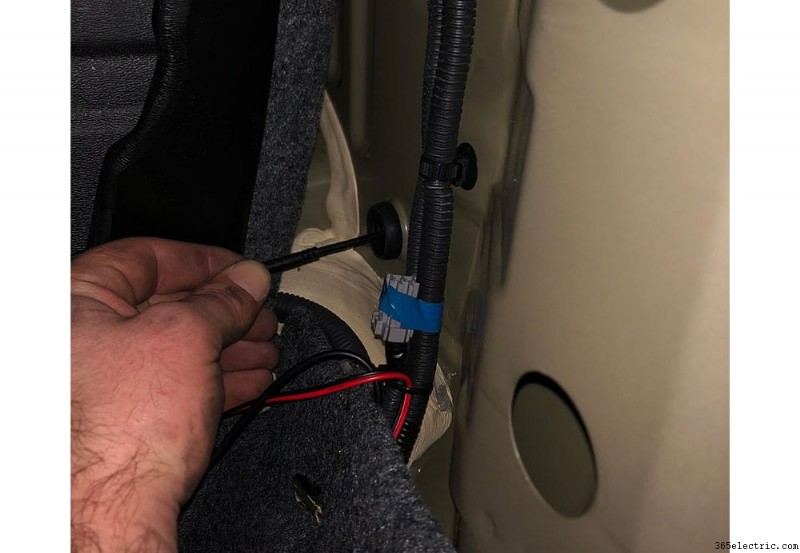
Before you mount the camera (license plate or not), feed the wire through the hole above the license plate and behind the bumper. Behind the plastic, there's a grommet that will lead directly into the back of the trunk where your positive, negative and signal wire should already be. Use a knife or drill to poke a hole in the grommet large enough to run the wire through it and place the grommet back into the hole with the wire fed through it. Once it's through the grommet, you should be able to access it from within the trunk area and connect it to the existing wires you've already ran.
The final step is to pull any extra wire through the grommet, and mount your camera. Once everything is plugged in and mounted you're ready to test! Plug in your camera signal wire into the back of your head unit, turn on the car and put it in reverse!
¡Gracias por leer! ¡Utilice los comentarios a continuación si tiene alguna pregunta/comentario!
- ·Cómo Obtener imágenes fuera de su teléfono celular con una tarjeta SD
- ·Cómo utilizar un flash esclavo con su cámara digital
- ·¿Cómo instalar un amplificador con una unidad principal Cq - C8100u
- ·Cómo agregar un After unidad principal mercado para un Honda Pilot
- ·Cómo enviar imágenes a un correo electrónico con un BlackBerry Curve
- ·Cómo transferir fotos desde el teléfono celular con Bluetooth
- ·Cómo subir fotos desde el teléfono a la computadora con un cable USB
- ·Cómo enviar Delanteros Con imágenes a un Teléfono
- Cómo transferir fotos desde el teléfono celular con Bluetooth
- Cómo Obtener imágenes de un chocolate con un USB
- Cómo tomar Natural -Luz- Looking fotografía con su cámara digital
- Cómo tomar Tiempo de retardo de fotografías con sus A630
- Los mejores mosaicos de fotos en 2022:haga una pared de galería con sus imágenes
- Haz que tu auto sea inteligente con una nueva unidad principal
